levelmyvan.com – help for parking a vehicle on uneven ground

levelmyvan.com - app that helps parking the van/camper/RV on uneven ground
levelmyvan.com – app that helps parking the van/camper/RV on uneven ground

I started to travel in a van a few months ago and the trip has gone well. Sometimes finding a parking spot where the ground is flat is impossible and you have to put leveling blocks under the tires otherwise you might be sleeping with your head slightly tilted downwards which feels odd.

I had had an idea for an app that tells you pitch and roll of the car already quite some time. Normal inclinometer app does not work very well for this purpose as you want to see the app while you are driving -> you need to place your phone on a phone holder -> your phone will not be on same level in the holder as your car floor. So the app needs a calibration functionality that computes and stores difference between the phone orientation on the holder and the level ground.

After checking if there exists a working app already, I only found apps which either did not have a calibration functionality (Yescapa Level), or the calibration was in my opinion done incorrectly/not accurately (Camper Leveler).

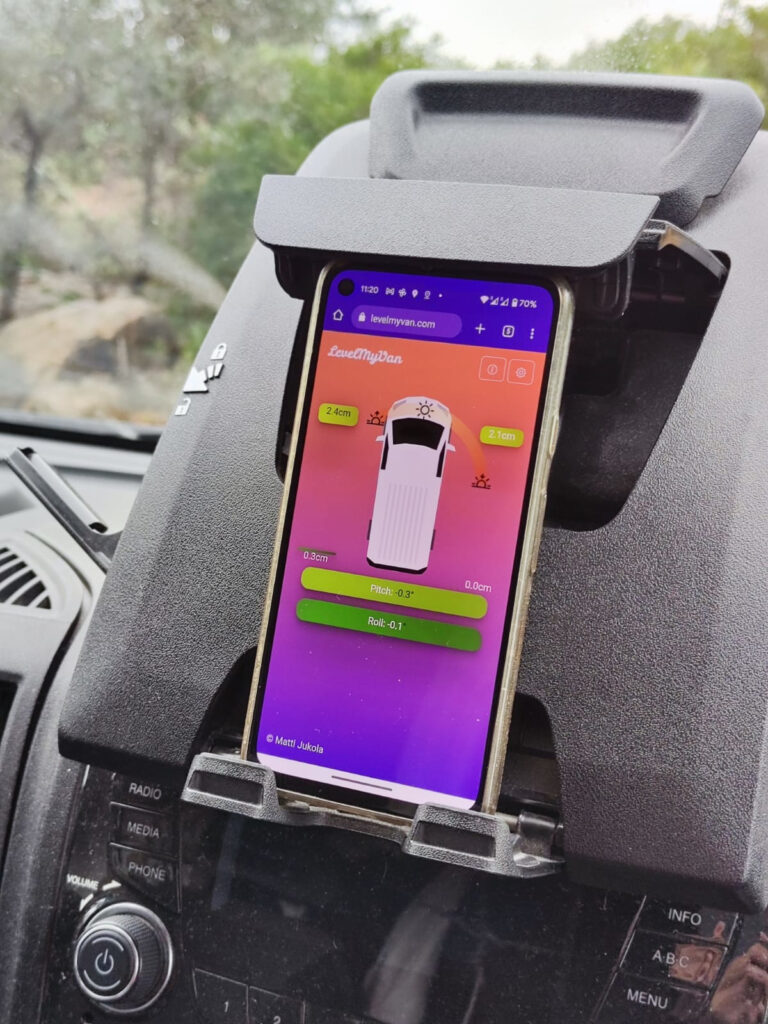
So I built levelmyvan.com. It’s free, does not need a registration and does not have any adds or tracking. It stores the calibration and some user settings on the browser local storage. It can also be used offline if it has been loaded at least once (uses web workers).

The calibration is based on measuring the phone orientation twice: while the vehicle is in the initial position and the second one after rotating the vehicle 180 degrees. This allows the app to measure the inclination of the current parking spot and to determine the true inclination of the phone holder in respect to the vehicle wheels. In other words, the calibration can be done even in uneven ground, but the vehicle needs to be turned around once.

If the user gives permissions to the device location (GPS), also sun rise and sun set locations in respect to the vehicle can be displayed.

The app should work in most phones which have an accelerometer. Tested on a Pixel 4a + Chrome and on some kind of iPhone + Safari.

I have noticed that at least on the Pixel 4a, the orientation (compass) of the phone is sometimes reported very inaccurately and you can see in the app that the returned value from the sensors is drifting for multiple seconds until converging into stable value. So I think it’s best to open the app at and let it get stable sensor reading for some seconds before trusting the values.

Let me know if the app is useful or you would like to see some additional features 🙂

Packaging tools into self contained executable with PyInstaller

Sometimes your project has useful internal tools, but building them can bit cumbersome for other teams which can lead to time being wasted trying to instruct how to get build environment setup and the tool compiled. It would be nice to distribute these internal tools as self contained executables for other teams. PyInstaller is a Python package that can create Linux and Windows binaries that extract the package contents and run a script/entrypoint. Here is a short tutorial how to package internal tools with PyInstaller.

If the tool you are packaging is a simple script that does not have external dependencies (for example non Python executables), packaging can be as easy as:

pyinstaller --onefile tool.py --name tool

But many times the tool uses some binaries that have been compiled and need to be added to the package. We can add extra files into to the package with --add-data:

# pyinstaller --onefile tool.py --name tool --add-data '<source>:<destination in package>'
pyinstaller --onefile tool.py --name tool --add-data 'file.txt:.'

Fixing paths

Above solution works quite well, but your tool will not automatically have access to the binary/file you included, as it most likely can not find the file.

To fix this, we need to add a wrapper script that modifies PATH environment variable and adds the extracted package path (or even sub directories) to the PATH.

When pyinstaller extracts the package content, it uses the tmp system directory and creates a random sub directory. Unfortunately __file__ global variable will not point to the correct location, but we need to check the correct location of the wrapper script with a small function:

import os
import sys

def get_script_location():
    if getattr(sys, 'frozen', False) and hasattr(sys, '_MEIPASS'):
        # Running from PyInstaller
        # Return location of the extracted package
        location = os.path.realpath(sys._MEIPASS)
    else:
        # Normal python run
        # When running PyInstaller package this would incorrectly return
        # current working directory
        location = os.path.dirname(os.path.realpath(__file__))
    return location

We can now add the script path to the PATH:

def add_to_path(p):
    os.environ['PATH'] = p + os.pathsep + os.environ['PATH']

add_to_path(get_script_location())

and then run the original script:

import tool
tool.main()

Check out https://github.com/buq2/pyinstaller_example for full example and how to cross compile the packages.

Easy Conan + CMake template for C++ projects

Conan is bit confusing. It seems to give you a lot of freedom to make mistakes on creating and configuring your project. I want show how Conan and CMake have worked really well for me on my projects.

First we want to define some required packages for the project and generators which help us setup the build system. We can do this by creating conanfile.txt in the project root.

[requires]
    protobuf/3.17.1
    grpc/1.39.1

[generators]
    cmake_find_package

Now we need to do some CMake configuration. We want to use Conan, but also give freedom for the user of the project to choose if they want to handle packages themselves. So we start by creating a CMake file which checks if user has Conan installed.

find_program(conanexecutable "conan")
if(NOT conanexecutable)
    message(WARNING "Tool conan is not installed. Check README.md for build instructions without conan.")
else()
    message(STATUS "Found conan. Installing dependencies.")
    if(NOT EXISTS "${CMAKE_BINARY_DIR}/conan.cmake")
        message(STATUS "Downloading conan.cmake from https://github.com/conan-io/cmake-conan")
        file(DOWNLOAD "https://raw.githubusercontent.com/conan-io/cmake-conan/master/conan.cmake"
                      "${CMAKE_BINARY_DIR}/conan.cmake")
    endif()
    include(${CMAKE_BINARY_DIR}/conan.cmake)
    conan_cmake_run(CONANFILE conanfile.txt
                    BASIC_SETUP
                    BUILD missing
                    CONFIGURATION_TYPES "Release")
    set(CMAKE_MODULE_PATH "${CMAKE_BINARY_DIR}" ${CMAKE_MODULE_PATH})
endif()

If Conan is found, the script downloads newest version of conan.cmake file from github which helps running Conan directly from the CMake. After including the file, we then execute conan_cmake_run for which we can set some configuration options such as file from which the Conan requirements, options and generators are read, if we want to build missing packages, and all build we want to use with multi build systems (such as Visual Studio). Finally we include build directory to CMAKE_MODULE_PATH such that CMakes FIND_PACKAGE can find FindXXX.cmake scripts which are generated by cmake_find_package Conan generator.

Finally in the main CMakeLists.txt file we include the above script and try to find the required packages for the project and later use the found targets.

include(cmake/conan_config.cmake)

find_package(Protobuf REQUIRED)
find_package(gRPC REQUIRED)

#...

target_link_libraries(main
    gRPC::grpc++_unsecure
    )

And that is it. If everything went smoothly, the project can be compiled with

cmake -S . -B build -DCMAKE_BUILD_TYPE=Release
cmake --build build --parallel 12

You can see the whole sample code in grpc-conan repo, here.

Everyday Docker tips

Docker has become one of my favorite tools to help with challenges of different build and run environments. When I want to create even a small example project, I usually start by creating first the Dockerfile for the build environment. When I have had to distribute more complex work for the client, images/containers have made the process almost painless.

I wanted to write down some of the things that have made my life much easier while using Docker.

Basic recap

This is post is not intended as a full tutorial / getting started guide, but let’s recap quickly. Basic Dockerfile usually looks something like this:

# base image on top of which we build our own
FROM ubuntu:20.04 

# Fetch package index and install packages
RUN apt-get update && apt-get install -y nano

# In which directory next commands will be applied.
# Also last WORKDIR will be CWD when the container is run
WORKDIR /data

# Copy data from the build directory to the image
COPY . /data

# Entrypoint is the default executable to be run when 
# using the image
ENTRYPOINT ["ls", "-la"]

I recommend looking through the Docker documentation for the Dockerfile for a lot more options.

To build the image we usually run:

docker build -t name-of-the-image .

And finally we run the image:

# --rm = remove container when it is stopped
docker run --rm name-of-the-image

Some additional useful commands

# List running and stopped containers
docker ps -a

# List disk space usage of Docker
docker system df -v

# Remove non running images/cache. Does not touch volumes (add --volumes to prune volumes too)
# Prompts for confirmation
docker system prune

# Monitor what is happening in the "docker system" by printing messages of started/exiting containers, networks etc
docker system events

Mounting volumes with -v

One of the first things I wanted to do with docker was to modify my host machines file system. This can be easily achieved with mounting volumes / binding. Easy mistake to make is to assume that if you have directory data in your current directory, and you want to mount it to /data, that you could do this with

# Current PWD directory structure
# . .. data build
# Following will not mount `data` directory, but will create a
# named volume `data`:
docker run --rm -v data:/data name-of-the-image

# Clean up
docker volume ls
docker volume rm data

Correct way to bind directories is to always use full paths. When using scripts to run the container, this gets bit more tricky as user can have the script in any directory. Fortunately Unix tools help with this:

docker run --rm -v `readlink -f data`:/data name-of-the-image
# Or when running git bash in Windows
docker run --rm -v `pwd -W`/data:/data name-of-the-image

readlink -f relative-path will return the full path for the relative-path. In Windows when using git bash, the paths returned by readlink are mangled and it would be better to use PowerShell, or if only subdirectories need to be mounted, pwd -W will work.

More robust way to apt-get update && apt-get install

Using just apt-get update && apt-get install will leave files in the final image and cause problems with caching and increase the image size. It is recommended to clean up after installing packages. Another good option to try out is adding --no-install-recommends to minimize number of additionally installed packages.

FROM ubuntu:20.04
RUN apt-get update && apt-get install -y --no-install-recommends \
    build-essential && \
    rm -rf /var/lib/apt/lists/*

BuildKit

BuildKit is something that has been integrated into newish versions of Docker to help with the build process. Most notable feature, at least for me, has been how you can handle secrets with it. To use the BuildKit features, the docker build needs to be run with

DOCKER_BUILDKIT=1 docker build .

Or alternatively you can enable it in /etc/docker/daemon.json

Addition to the env variable, the Dockerfile itself needs to start with following line:

#syntax = docker/dockerfile:1.2
FROM .....

On some earlier versions of Docker you might need to use line:

# syntax = docker/dockerfile:1.0-experimental
FROM .....

Secrets

Sure way to shoot yourself in the foot is to copy any credentials into the image while building it. For example following will leak your ssh keys:

COPY .ssh /home/root/
RUN git clone git@github.com:some/internal_repo.git && \
    <build> && \
    rm -rf /home/root/.ssh

Correct way to use secrets while building the image is to use build in secrets sharing. This complicates the build command a bit, but things are easily fixed with small bash script:

#!/bin/bash
if [[ $_ == $0 ]]
then
    echo "Script must be sourced"
    exit 1
fi

# To use ssh credentials (--mount=type=ssh), we need
# ssh-agent. Many desktop environments already have the
# service running in the background, but for more bare
# bones desktop envs might need to start the service
# separately.
if [[ -z "${SSH_AUTH_SOCK}" ]]; then
    echo Starting ssh-agent
    eval `ssh-agent -s`
    ssh-add
fi

# If your organization uses custom DNS, copying the resolv.conf
# could help with the build.
cp /etc/resolv.conf .

# The `--ssh=default` arg is the most important one
# and works 90% of the cases when using git clone.
# .netrc many times contains tokens which are used with 
# services such as Artifactory.
# .gitconfig helps with repo tool.
DOCKER_BUILDKIT=1 docker build --secret id=gitconfig,src=$(readlink -f ~/.gitconfig) --secret id=netrc,src=$(readlink -f ~/.netrc) --ssh=default -t image-name .

This script can then be run with

source name_of_the_script.sh

To use the secrets we need to tiny modifications to the Dockerfile, mostly to the lines which need the secrets:

#syntax = docker/dockerfile:1.2
FROM ubuntu:20.04

RUN apt-get update && apt-get install -y git && \
    rm -rf /var/lib/apt/lists/*

# If we need custom DNS. This is not considered a secret and is
# left in the final image
COPY resolv.conf /etc/resolv.conf

# To prevent cli asking if we trust the host, 
# which requires interaction, we should add
# new hosts to ~/.ssh/known_hosts
RUN mkdir -p ~/.ssh/ && ssh-keyscan -t rsa github.com > ~/.ssh/known_hosts

RUN --mount=type=secret,id=netrc,dst=/root/.netrc \
    --mount=type=secret,id=gitconfig,dst=/root/.gitconfig \
    --mount=type=ssh \
    git clone git@github.com:some/internal_repo.git

For more information, Docker docs helps 🙂.

This post also had quite concise explanation of the alternatives and why not to use them.

Caching

To speed up the build process Docker caches every layer. Sometimes this causes problems and confusion when newest data is not used for building. For example when trying to clone a git repo and building the content, it is easy to forget that the RUN git clone git@github.com:buq2/cpp_embedded_python.git is in the cache and no new commits will not be copied to the image.

One way to solve this is to completely bypass the cache and run the build with

docker build --no-cache -t name-of-the-image .

Usually this is too harsh option, and it could be better to just trash the cache by changing something before the clone command and this way forcing docker to reclone the source.

FROM ubuntu:20.04
RUN apt-get update && apt-get install -y build-essential && \
    rm -rf /var/lib/apt/lists/*
ARG CACHE_TRASH=0
RUN git clone git@github.com:buq2/cpp_embedded_python.git

Now we can build the image with:

docker build --build-arg CACHE_TRASH=$RANDOM -t name-of-the-image

Multi-stage builds

One of the best ways to clean up the the image and save space is multi-stage builds. In multi-stage build data from previously build image is used to construct the final image.

# First stage containing common components
FROM ubuntu:20.04 as base
RUN apt-get update && apt-get install -y \
    some dependencies && \
    rm -rf /var/lib/apt/lists/*

# Second stage that builds the binaries
FROM base as build
RUN apt-get update && apt-get install -y \
    build-essential cmake git && \
    rm -rf /var/lib/apt/lists/*
WORKDIR /src
RUN git clone git@github.com:some/repo.git && \
    cmake -S repo -B build && \
    cmake --build build --parallel 12

# Third stage that is exported to final image
FROM base as final
COPY --from=build /src/build/bin /build/bin
EXECUTABLE ["/build/bin/executable"]

Minimizing image size vs minimizing download time

To make sure that the final image contains only data that was visible in the last layer, we can use --squash when building the image. This will produce image with only single layer.

docker build --squash -t name-of-the-image

Unfortunately even though the image size is small, it is often slower to download than multilayer image, as Docker will download multiple layers in parallel.

In a one case when trying to minimize image download time for an image which contained a 15GB layer produced by single RUN command, I created a python script which sliced the huge directory structure into multiple smaller directories and then used a multi stage build to copy and reconstruct the directory structure. This way the 15GB download was sped up significantly.

No, I don’t want to choose the keyboard layout

Sometimes when installing packages the build process stops and prompts keyboard layout. To avoid this DEBIAN_FRONTEND env should be set:

FROM ubuntu:20.04
ARG DEBIAN_FRONTEND=noninteractive
RUN apt-get update && apt-get install -y --no-install-recommends \
    i3 && \
    rm -rf /var/lib/apt/lists/*

Running graphical apps inside of the container

Sometimes it would be nice to run graphical apps inside the container. Fortunatley this is quite easy with x11docker.

curl -fsSL https://raw.githubusercontent.com/mviereck/x11docker/master/x11docker | sudo bash -s -- --update
x11docker x11docker/xfce xfce4-terminal

On Windows GWSL seems to be very easy to use.

GUI apps should also be possible on OSX, but for me xquartz has not worked really well even without Docker, so I have not tried this one out.

GUI apps without x11docker on Linux

It’s possible to run GUI apps in Linux without x11docker, but it’s much more brittle:

docker run -it --rm --net=host -e DISPLAY=$DISPLAY --volume="$HOME/.Xauthority:/root/.Xauthority":ro x11docker/xfce xfce4-terminal

Packaging complex application with Docker and Python script

When packaging an application with Docker, it would feel nice to just send the pull and run commands to the customer. But when the application requires mounting/binding volumes, opening ports, running GUI, it soon becomes nightmare to document and explain the run command for all the use cases.

I have started to write small Python scripts for running the container. My bash skills are bit limiting and every time I have written a bash script for running the container, I have ended up converting it to a Python script.

Here is quick example

#!/usr/bin/env python3

import argparse
import os

def get_image_name(args):
    return 'name-of-the-image'

def get_volumes(args):
    path = os.path.abspath(os.path.realpath(os.path.expanduser(args.data_path)))
    if not os.path.exists(path):
        raise RuntimeError('Path {} does not exists'.format(path))
    cmd = '-v {path}:/data:ro'.format(path=path)
    return cmd

def get_command(args):
    return 'ls -la'

def run_docker(args):
    cmd = 'docker run {volumes} {image_name} {command}'.format(
        volumes=get_volumes(args),
        image_name=get_image_name(args),
        command=get_command(args))
    os.system(cmd)

def main():
    parser = argparse.ArgumentParser()
    parser.add_argument('--data_path', 'Mounted path')
    args = parser.parse_args()
    run_docker(args)

if __name__ == '__main__':
    main()

Inspecting images and linting

Sometimes you want to get bit more information how the image has been build and what kind of data it contains. Fortunately there is some tools to do this.

Dive is command line tool that processes the image and can display what changed in each of the previous layers. As a Docker tool, it is of course available as a Docker image:

docker run --rm -it \
    -v /var/run/docker.sock:/var/run/docker.sock \
    wagoodman/dive:latest name-of-the-image-to-analyze

Second useful tool is Hadolint which let’s you know how poorly you made your Dockerfile.

docker run --rm -i hadolint/hadolint < Dockerfile

This Hacker News post listed few other interesting looking tools, but I have had no change to really test them out.
Zurich water fountain map for running and biking

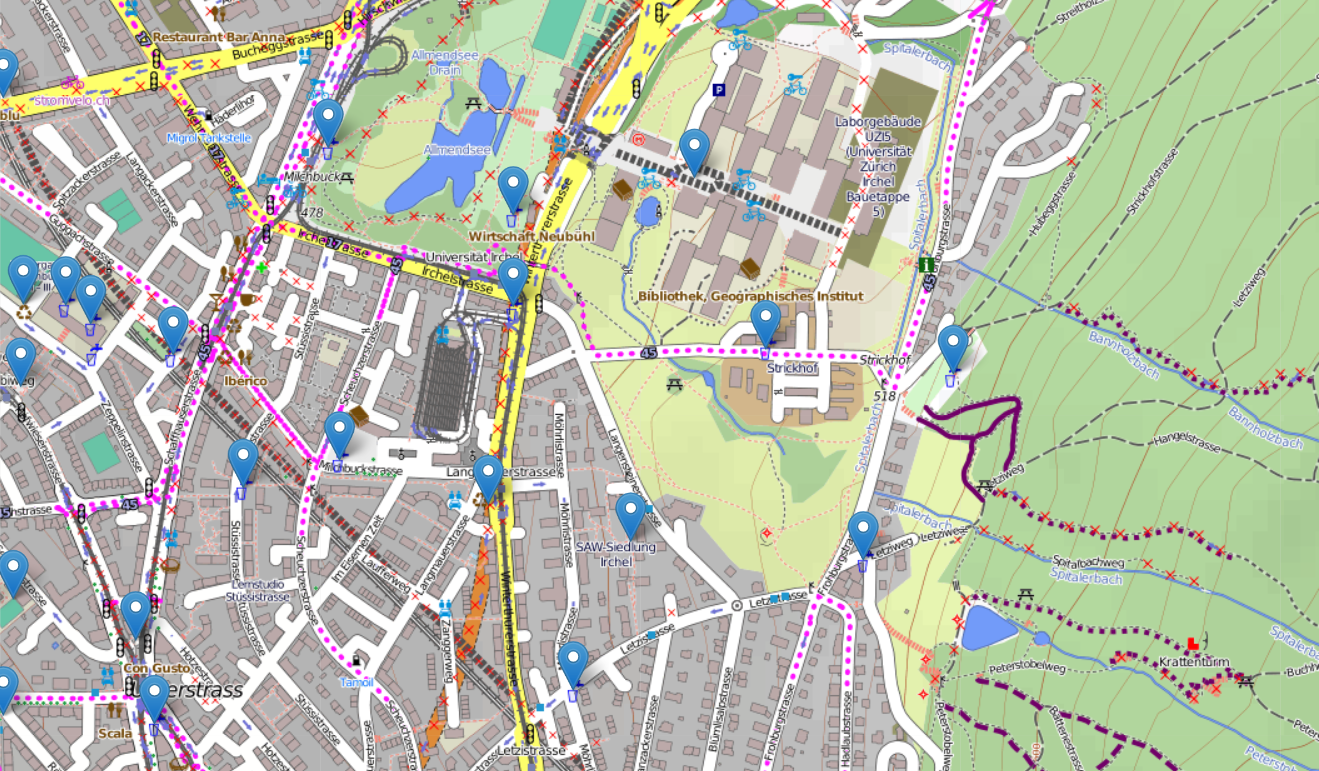
As we moved to Zurich recently, I have been exploring the city by running. Many of the days have been pretty warm and we unfortunately misplaced the running belt while packing our stuff for the move. Fortunately Zurich has around 1200 public water fountains to drink from, and even better there is a dataset containing all the locations of the fountains (https://data.stadt-zuerich.ch/dataset/geo_brunnen). Matthew Moy has build a map (https://skyplan.ch/maps/zurich-water/) on top of the dataset which is pretty good, but the graphics are not designed for outdoor activities and centering to current location seems to only work once per page load.

As the data is open, I decided to build simple and pretty light weight map page which contains up to date (2020) locations of the water fountains: https://buq2.github.io/zurich-water-fountains-map/

The map graphics are more suited for outdoor activities and the page also draws the users route which hopefully helps when trying to orient yourself while trying to find nearest fountain. I hope some one else also finds the map useful.

Learning to sew: Designing and creating a wingsuit – Ramblings

Few years ago I saw video (1) of a home build miniature parachute made by my friend Tuukka. The video inspired me quite a bit as before the video I didn’t feel like you could actually build any real “hardware” for skydiving without going to rigging courses and practicing a lot. I felt that designing and building parachute would be too much for my skills, but maybe I could still make something from fabrics.

In 2017 Tuukka jumped his home build and designed parachute (2).

At the end of 2016 skydiving season I borrowed a sewing machine, purchased cheap fabric and spend one evening sewing my very first tracking pants without any sewing patterns. The pants were huge failure (air intakes tore and the pants functioned as a air brakes), but hey, at least I created something.

During the winter I designed first tracking pants which I tested on the first jump of 2017. Unfortunately the design was not very good and the crotch seam and fabric was torn after two jumps while squatting on the ground.

Next there was a design for tracking jacket, but the design for the shoulders was so bad that I didn’t jump any jumps with the thing.

Finally third tracking pants+jacket design was relative good and I was able to have glide ratio around 1.1.

Natural progress towards diy wingsuit required diy one-piece tracking suit so I build one in late 2017. The suit was little bit hard to fly and I’m still not sure of performance of the suit. But at least it looked quite nice.

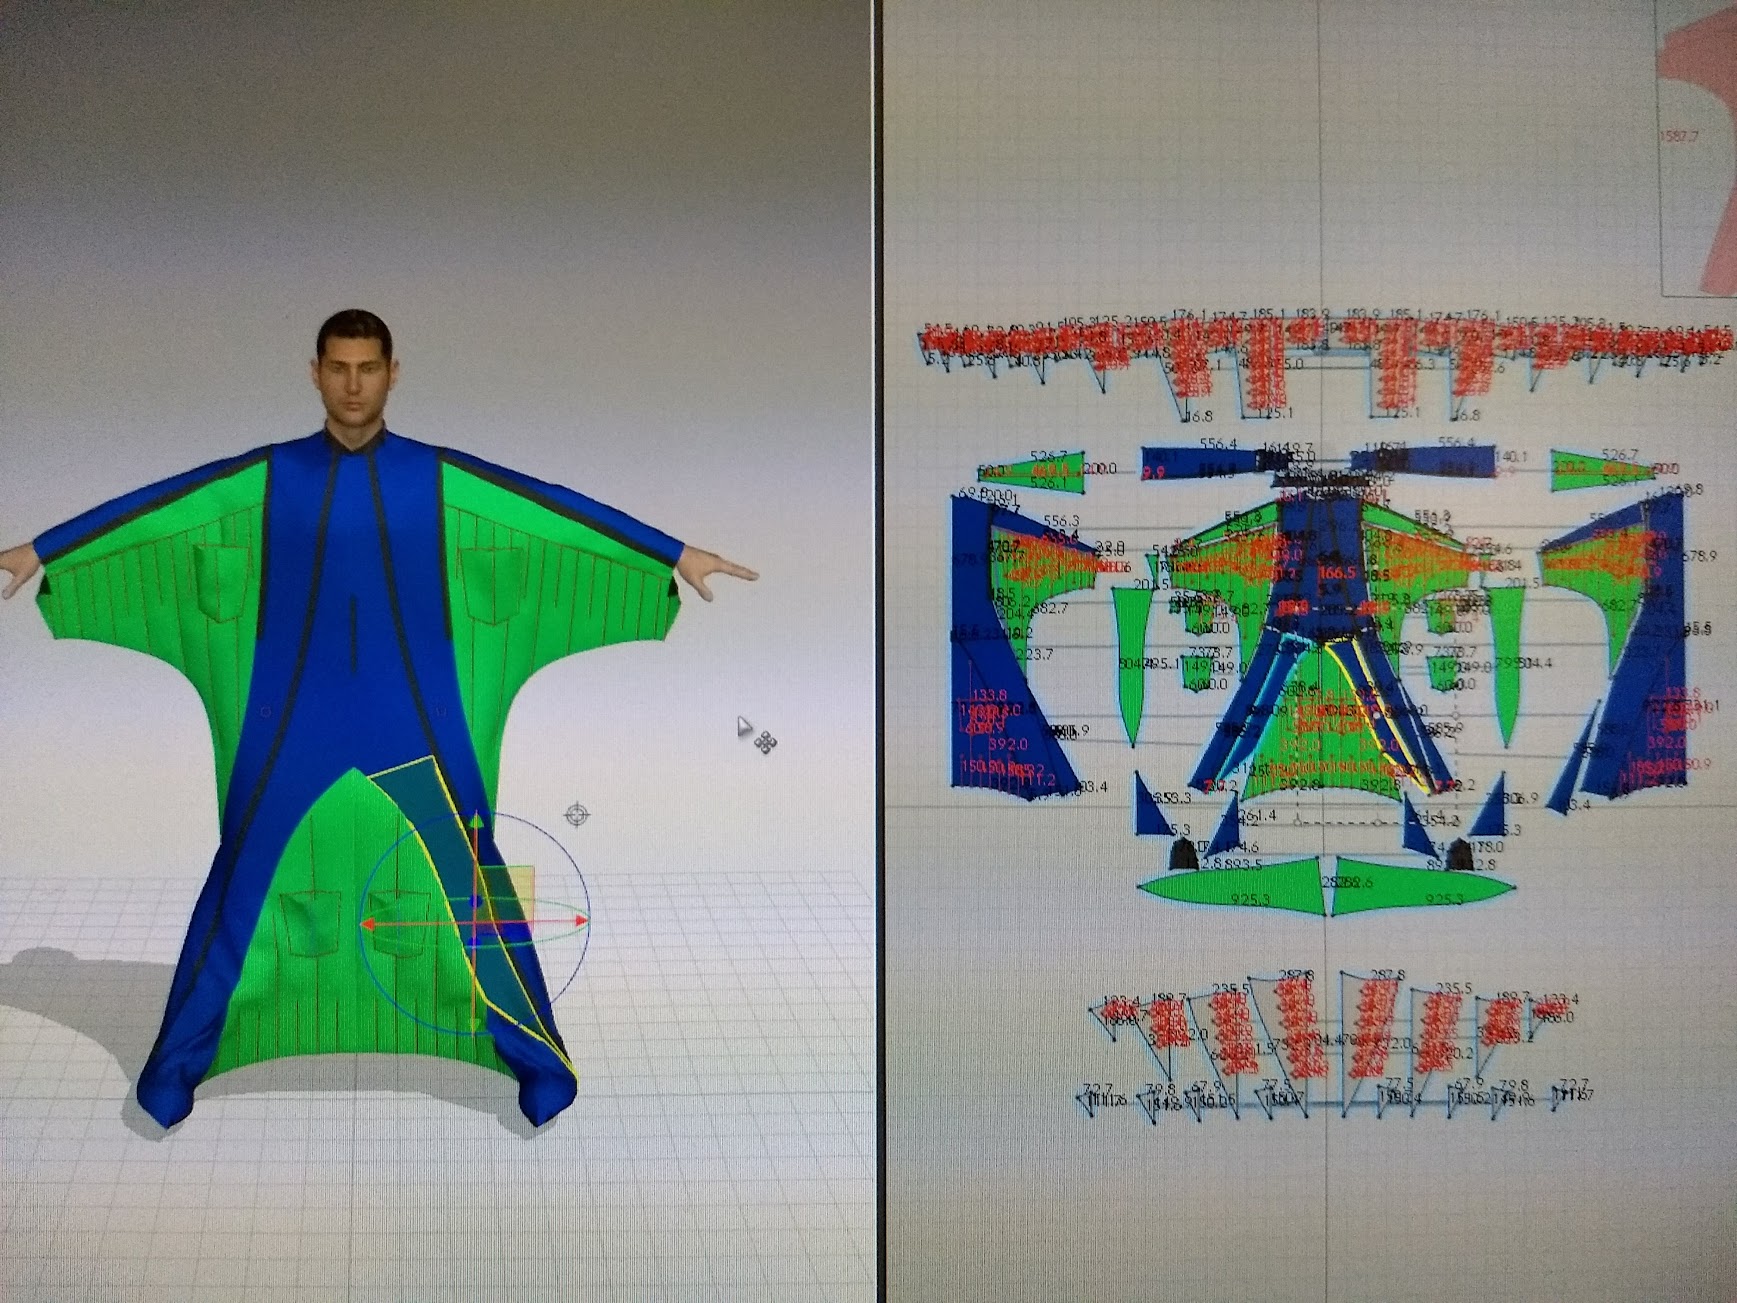
In December 2017 I started designing the diy wingsuit. I looked at beginner/advanced beginner level wingsuits from different manufacturers and draw a outline of the wingsuit in Inkscape. I used my friends Colugo 2 wingsuit to get idea of the details. Design was done once again in Clo3d/Clo. It took approximately 10-15 hours to design the suit. I ordered the pattern from a printing company which specializes in construction design drawings. This way I didn’t have to tape more than a hundred A4s together to get the full pattern.

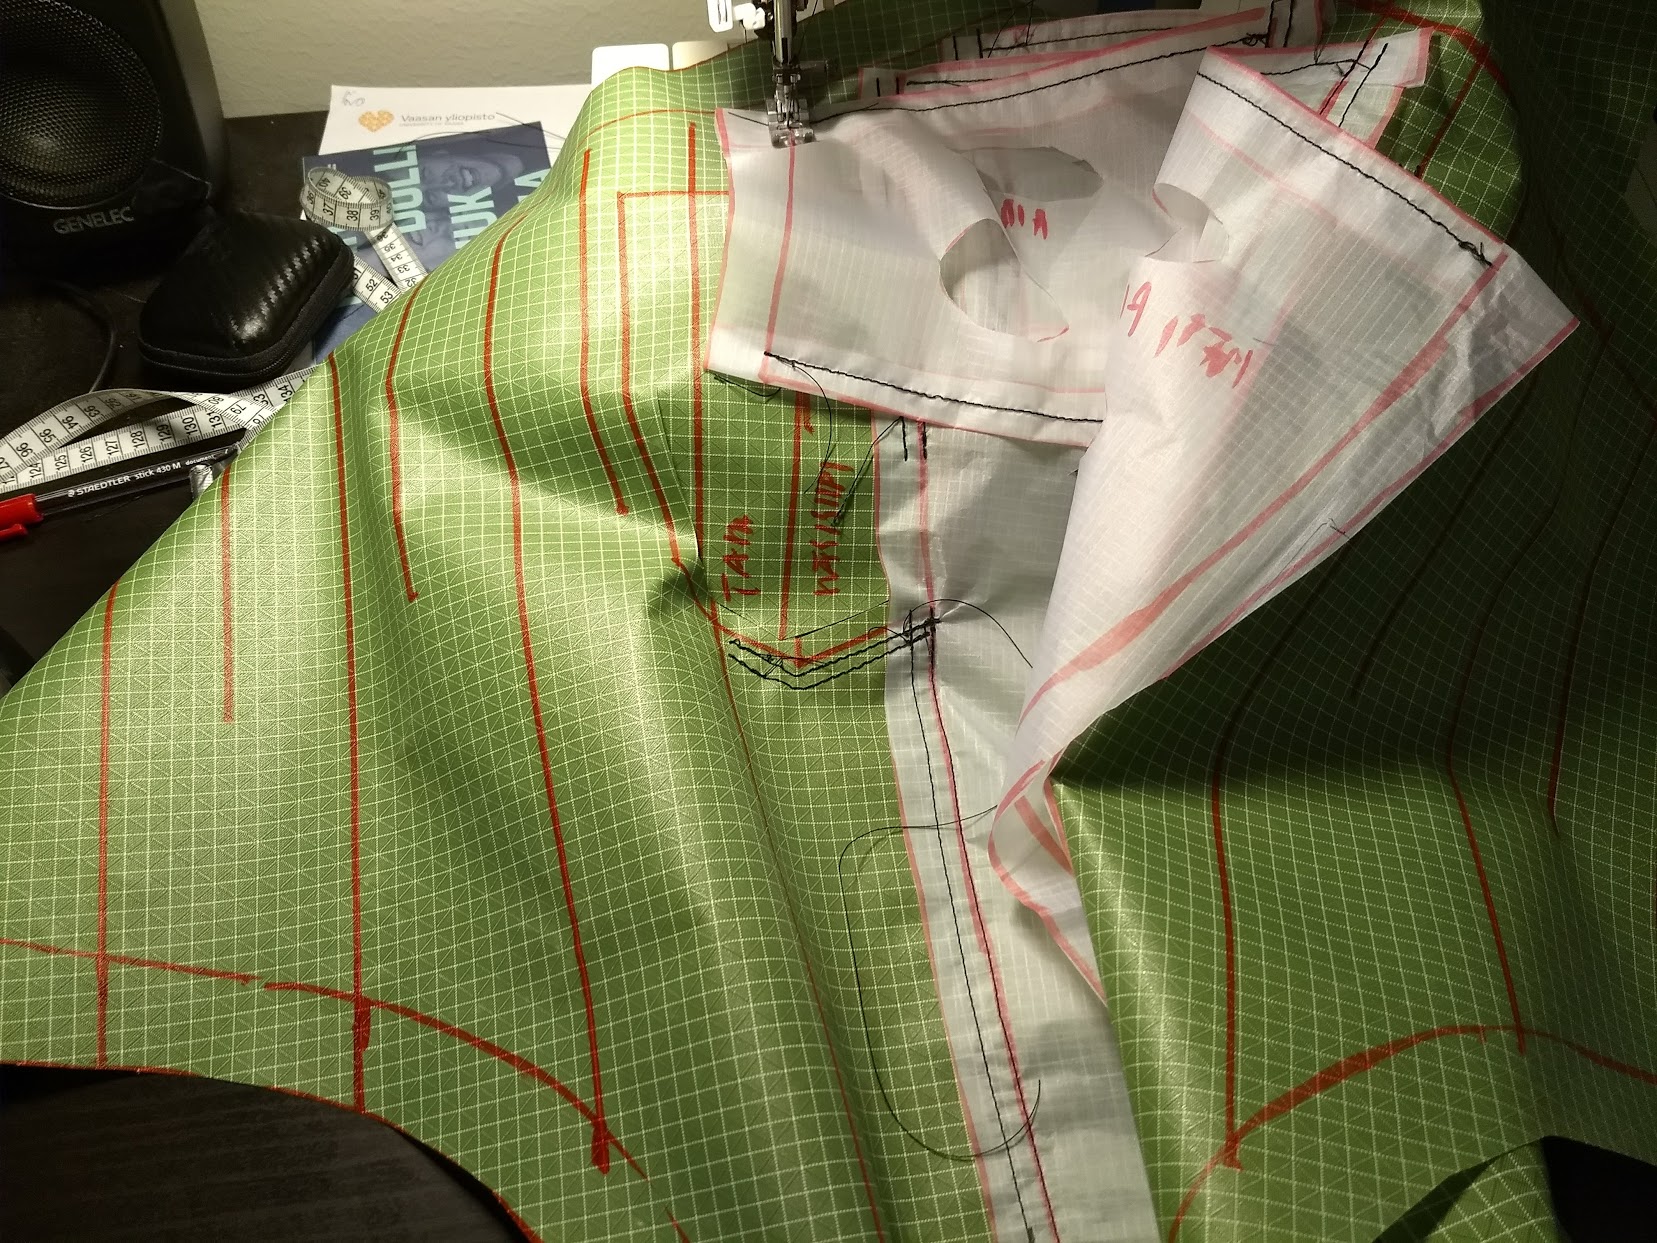
Cutting the patterns took only about one hour. Cutting and sewing the first arm wing took about 9 hours, with the second one I made few stupid mistakes and had to unpick the half finished wing back to its basic components.

Quite soon I realized that the leg wing had a design flaw as it did not extend over the buttocks as all commercial wingsuits. Unfortunately at this point modifications were too hard to make for my skills, but I decided to complete the suit.

After about total of 60-120 hours of work the suit was finished. The arm wings still were little bit rough as the sewing machine started to malfunction at the very last hours.

Finally in 2018-04-22 I did first jump with the wingsuit (also my very first wingsuit jump). The suit was very stable and the jump went well. In 2018 I had about 6 jumps with the wingsuit, every one of them quite stable (except when trying backflying). I can achieve around 1.8 glide ratio (wind compensated) with the suit, but I think the GL could be much better with practice.

Unfortunately when moving away from Finland, I had to leave the suit to storage as space in the van was very limited.

Hopefully I return to the suit at some point, maybe I will get few jumps with ‘real’ suits in between.

Links

Skydiving helmet chin mount update

I have got few questions about the chin mount for G3 and how has it been working. I have not used the mount for more than a year as the original mount was little bit too long and had poor contact with the G3 which caused wobbling. I felt that the base of the mount would have needed at least one or two updates to get it working well enough for daily use.

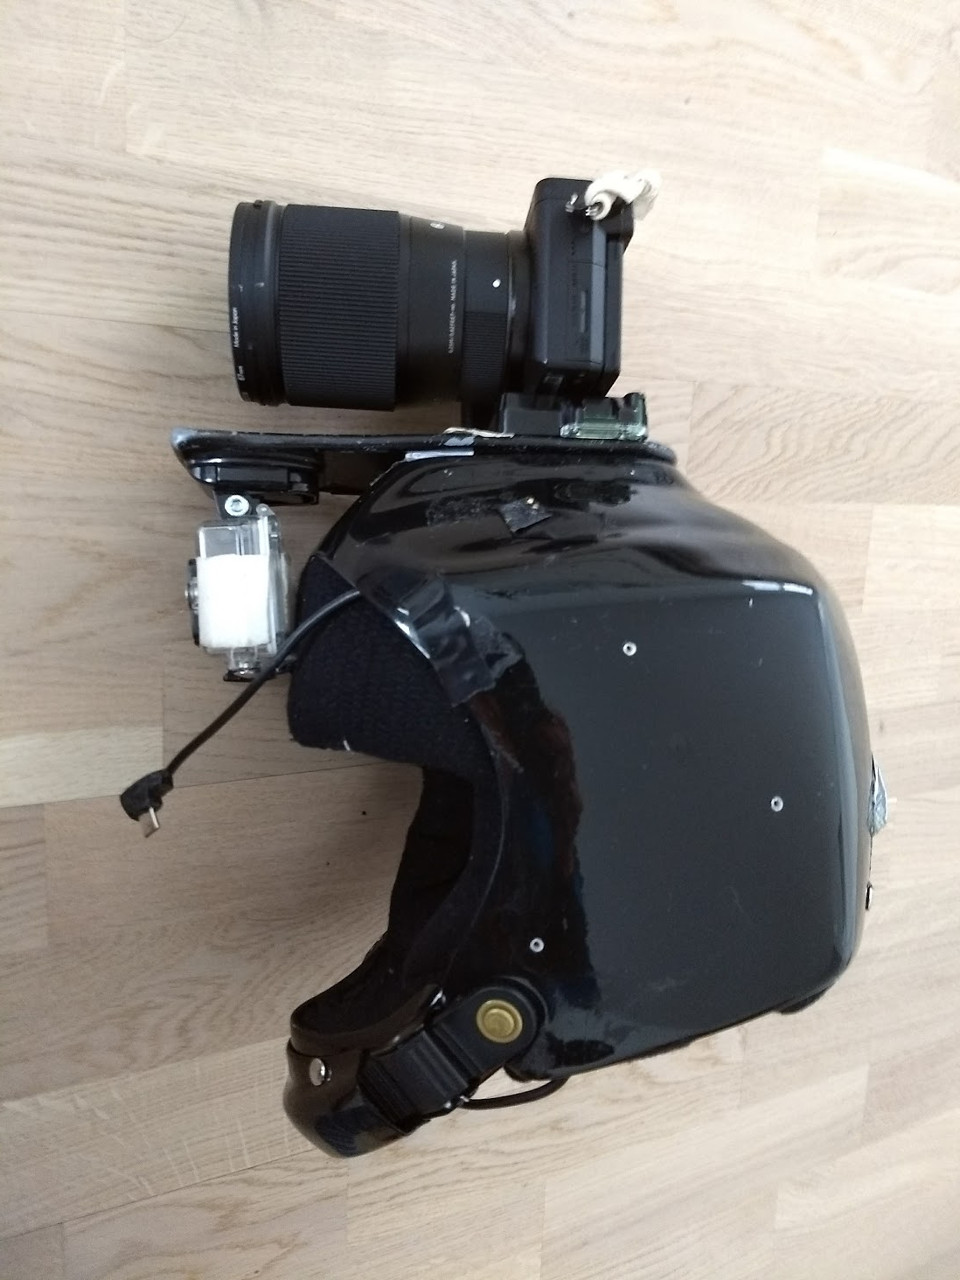
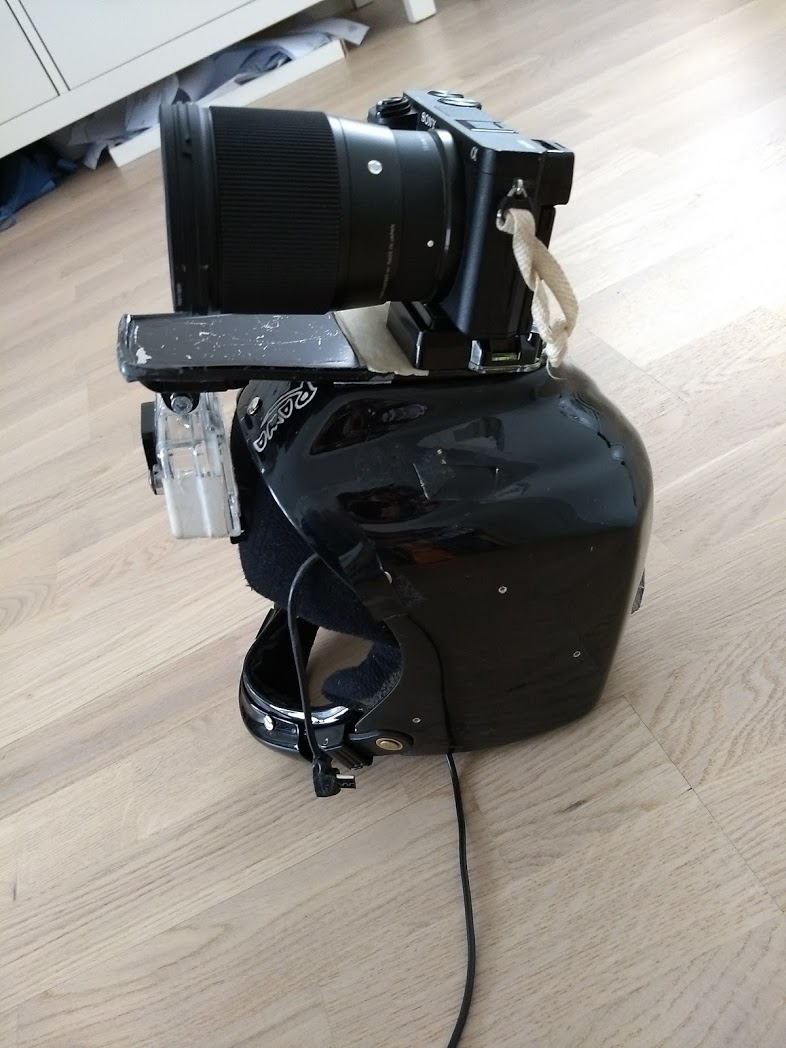
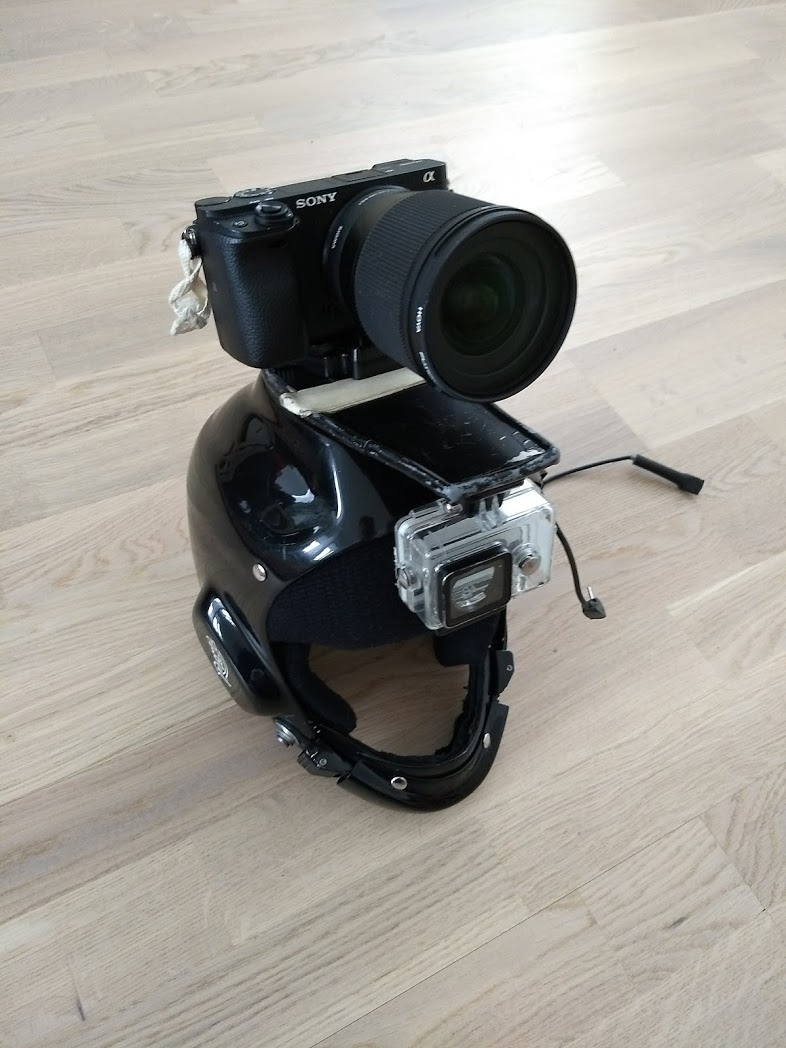
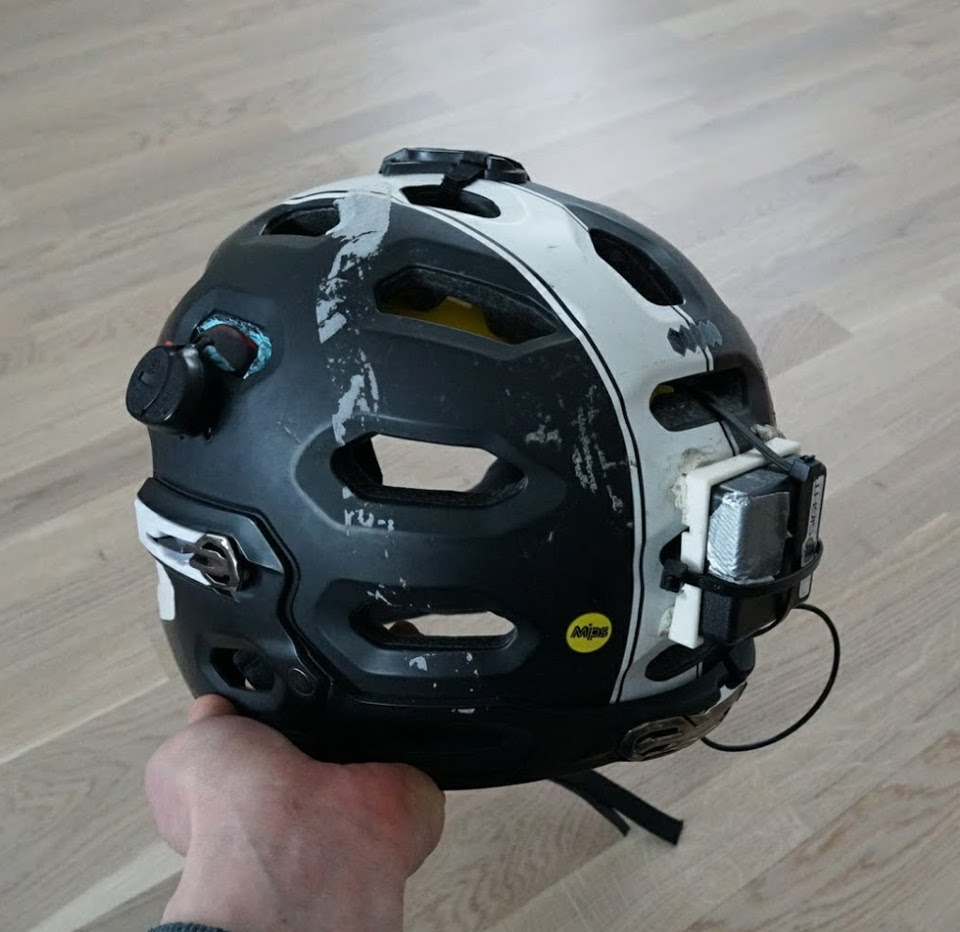
Unfortunately I didn’t have time to do the updates and people who have requested the original model files have not sent any updates back 🙂 I also started doing little bit more serious photography and I had to change the helmet to this monstrosity:

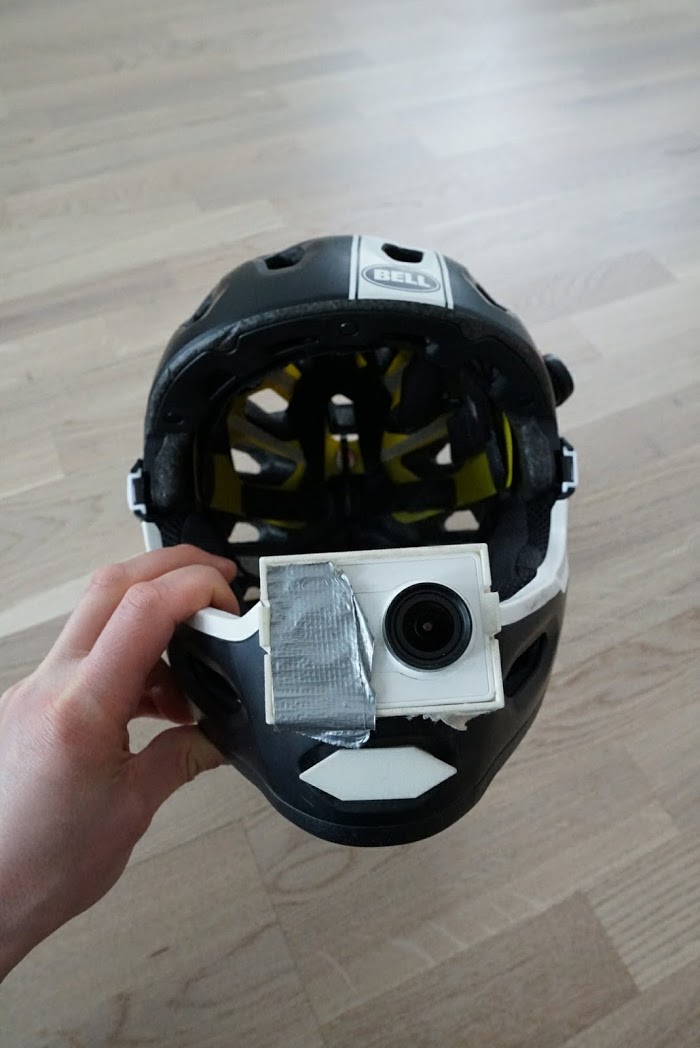
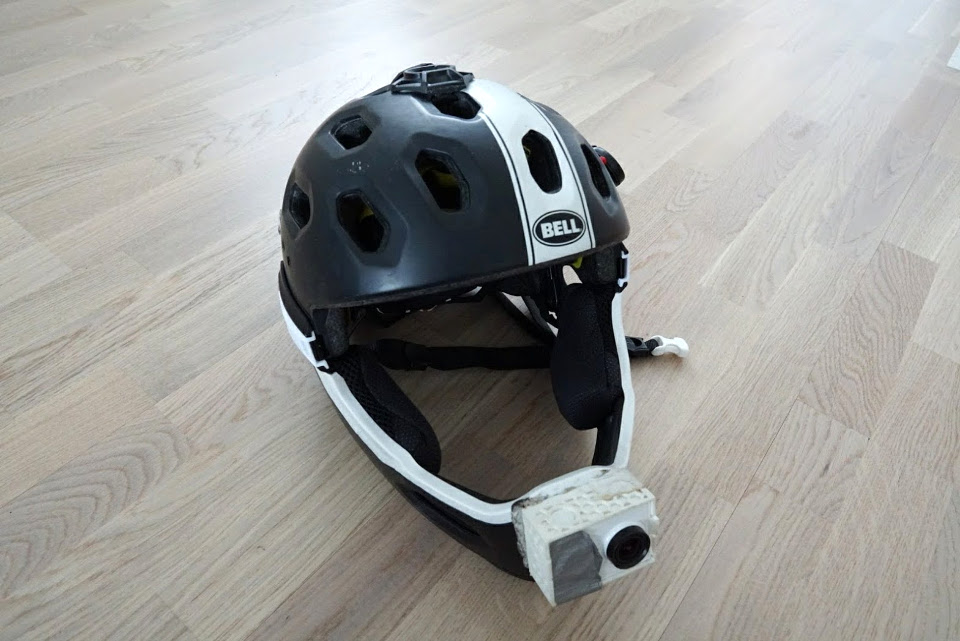
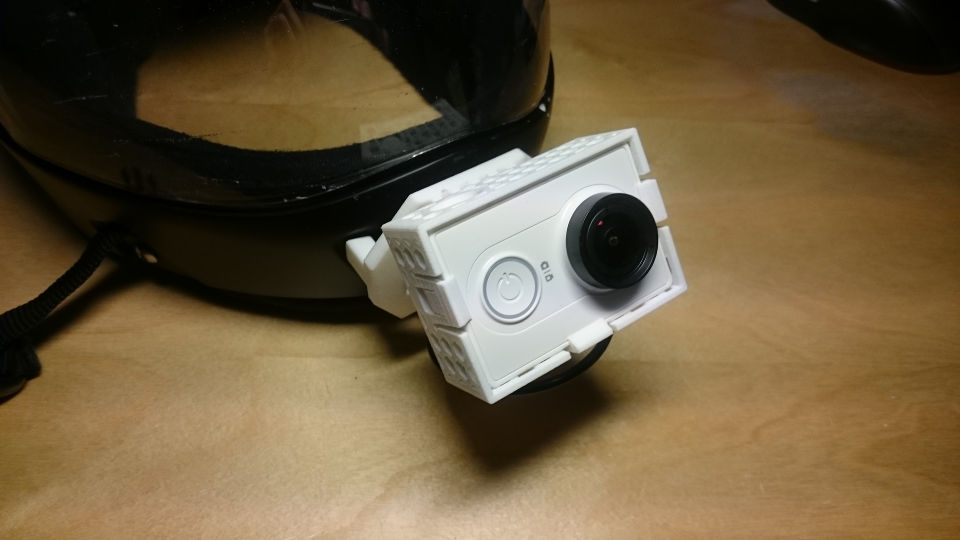
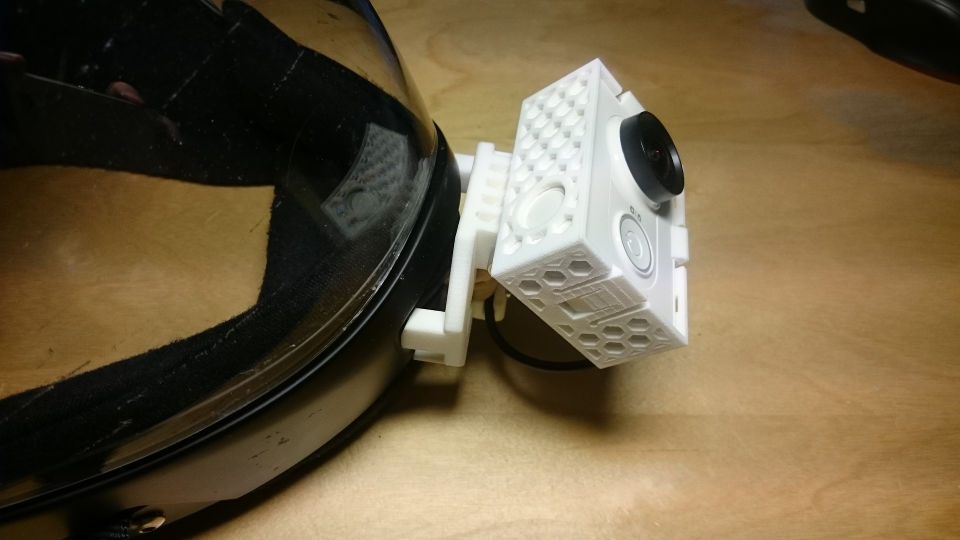
But I did make a new model for Bell 2R mountain bike helmet which is completely snag proof. The new model is not adjustable and there is no easy way to get the camera out of the mount or to do a cut away, but the position and angle of the camera are very good for its purpose. I would recommend the mount+helmet combo for anyone wanting to have a very safe helmet. Unfortunately the mounting uses blu tack which makes it look very hackey. I would not recommend using the white one as it gets dirty in a week 🙂

There is also smallish flysight mount at the back of the helmet. The fit of the flysight mount is not very good, but its easy to use and serves its purpose.

Skydiving helmet chin mount

After getting skydiving C-license I have been allowed to carry camera during the jumps (see my jump videos at Youtube). Usually small action cameras are mounted on top of the helmet but as planes have quite restricted head room the camera is constantly exposed to small strikes. Also one of the most popular skydiving helmets, Cookie G3, does not have cutaway system which would allow the helmet to be quickly removed if the parachute is tangled to the camera.

I was looking for a camera for next season and I had hoped that new GoPro would have been announced before the new year but it seems that it will be delayed past start of the season. For mounting the camera I had decided that mounts made by Grellfab would be the safest option as the camera is mounted infront of the chin and the actual camera mount has cutaway system. Unfortunately as the Gopro was not announced and all Grellfab mounts have little bit different connection to the actual camera, I could not make the order.

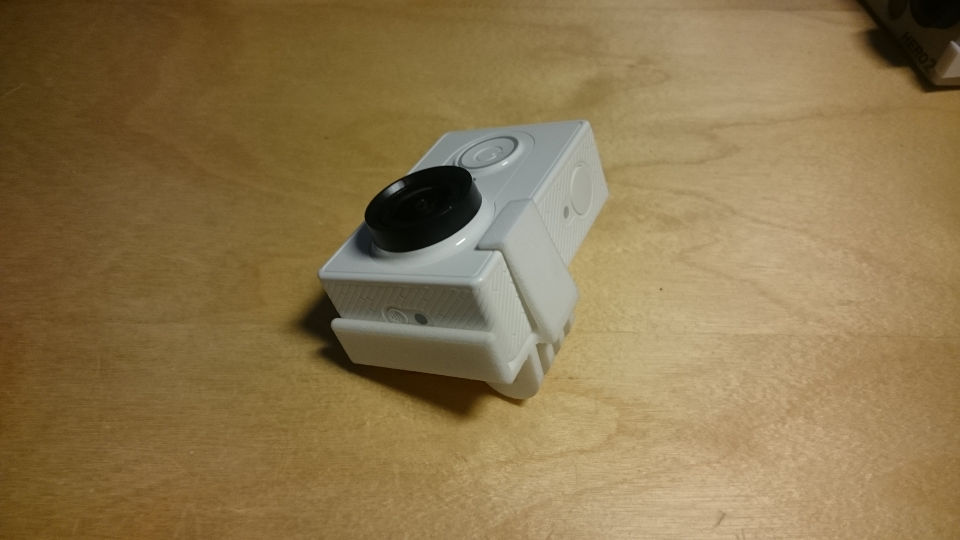
Frustrated I decided to order cheap Chinese action camera Xiaomi Yi (~70€ instead of ~450€ for top of the line Gopro) and to 3D print the mounting system.

During the Christmas holidays I was able to reverse engineer the Cookie G3 chin piece and design mounting system for the Xiaomi Yi. I have not had change to study Grellfabs system so I had to make few wild guesses what would make functional design.

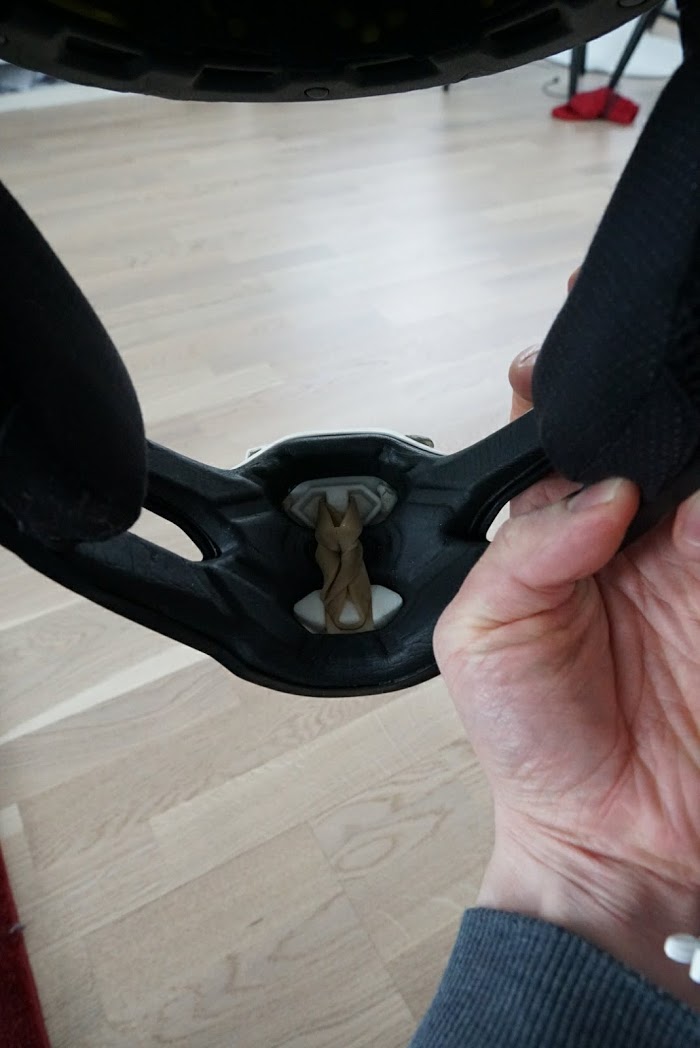
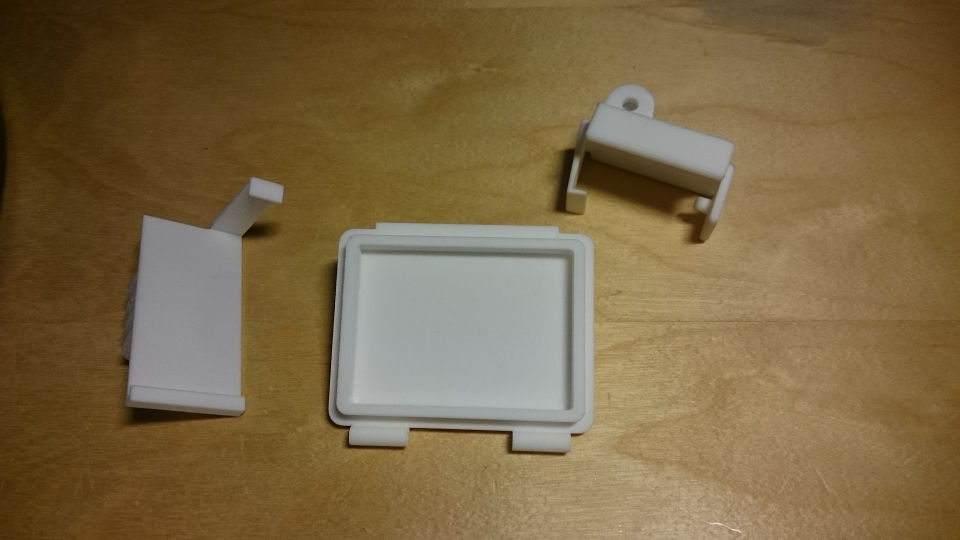
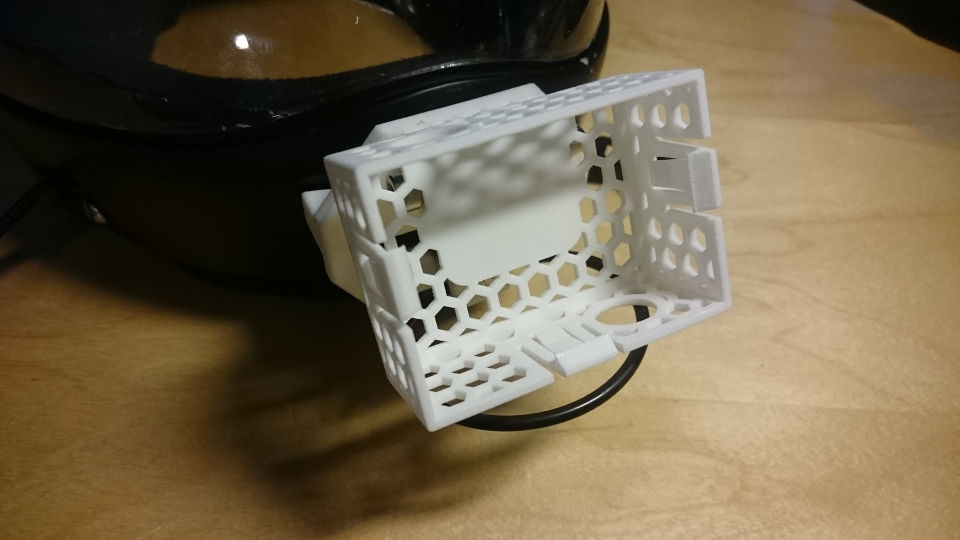
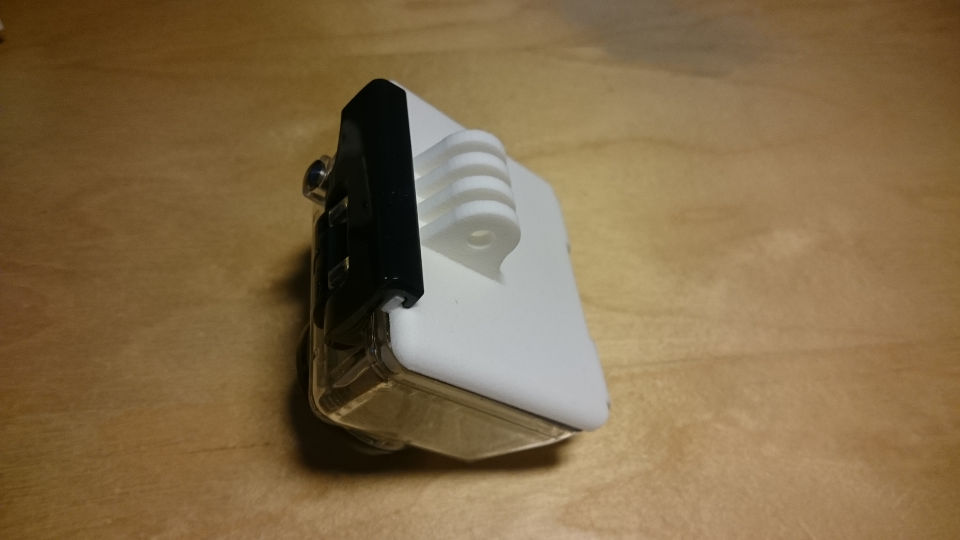
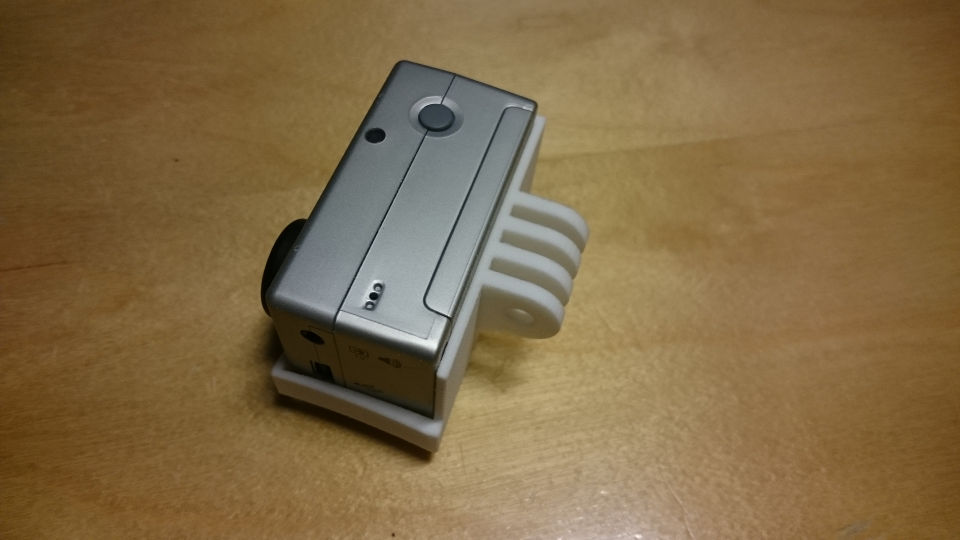
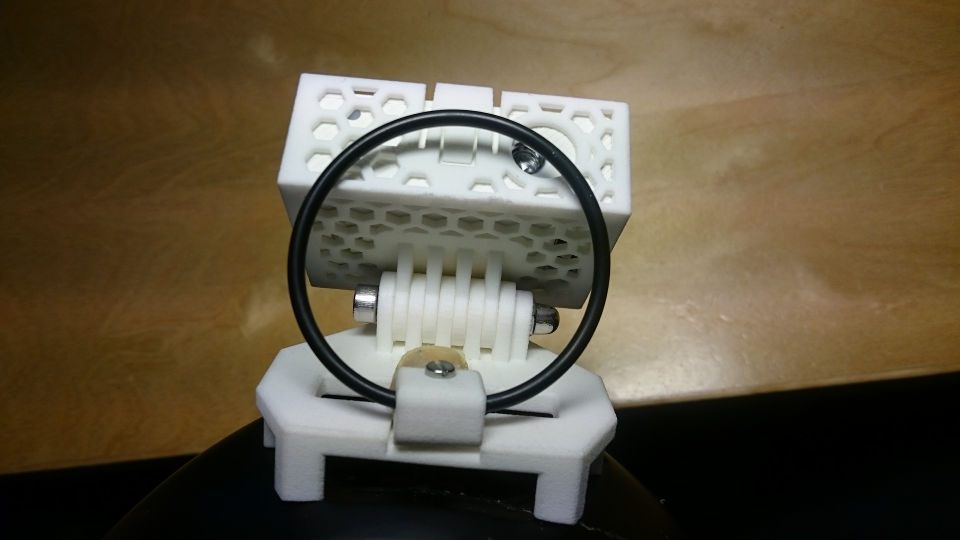
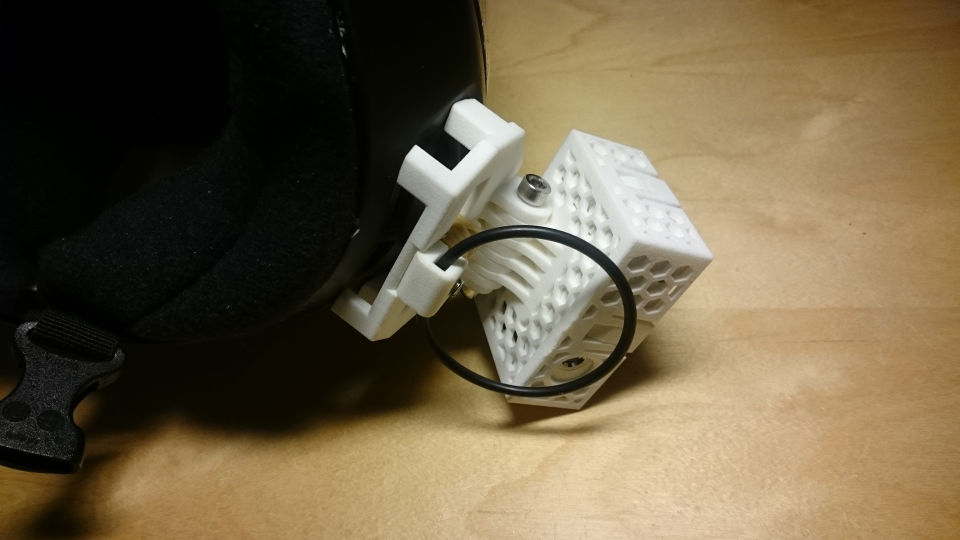
The final mounting system has three pieces, first one is plate which attaches to the helmet using rubber bands and cutaway pin. Third is the actual camera case/housing. Main reason for three piece system (pin+plate+case) instead of two piece (pin+mount) was that I had no idea for best camera angle. With two piece design the mount would protrude much less than with the adjustable one.

Modeling was done in Solidworks and the 3D prints were ordered from Sculpteo. I made the order on 2015-12-28 and the packet arrived 2016-01-05, really quick service! I’m quite happy with the quality, only quite annoying aspect is that all surfaces have expanded 0.05mm (things which should be 3.00mm are now 3.10mm). This casuses the rotating mechanism to be too tight and I had to use sandpaper to fit the parts together. On the other hand this was expected and as now the expansion is known it can be taken into account in future models.

The models have few mistakes which makes them rather annoying to use. The skeleton case with hexagon pattern is very firm over the camera. Unofrtunately I forgot to add way to push the camera out of the case. Now you need to pull all three restraining pins and then push the camera with a screwdriver. I think that one or two restraining pins would be enough.

Second mistake was made with the cutaway pin. Screw keeping the o-ring in place should be flush with the surface but the cut for the screw head was accidentally made 1mm too small. Another 3mm hole in the pin is intended for testing the structural strength of the pin.

The rotating mechanism uses four extrusion compared to Gopros two. Originally I thought that the material (“Strong and flexible” or Nylon) would be way too flexible and would need more support but after some comparisons to Gopros mechanism I think that two extrusions might be enough (although the Gopros material is little bit stiffer).

I hope that I will have time to make necessary changes and order new batch before start of the season. I also think that I will try to make few chin mounts for friends who have helmets for which Grellfab does not sell mounting. Also if I figure how to ship the mounts cheaply I might start selling them.

How image is formed

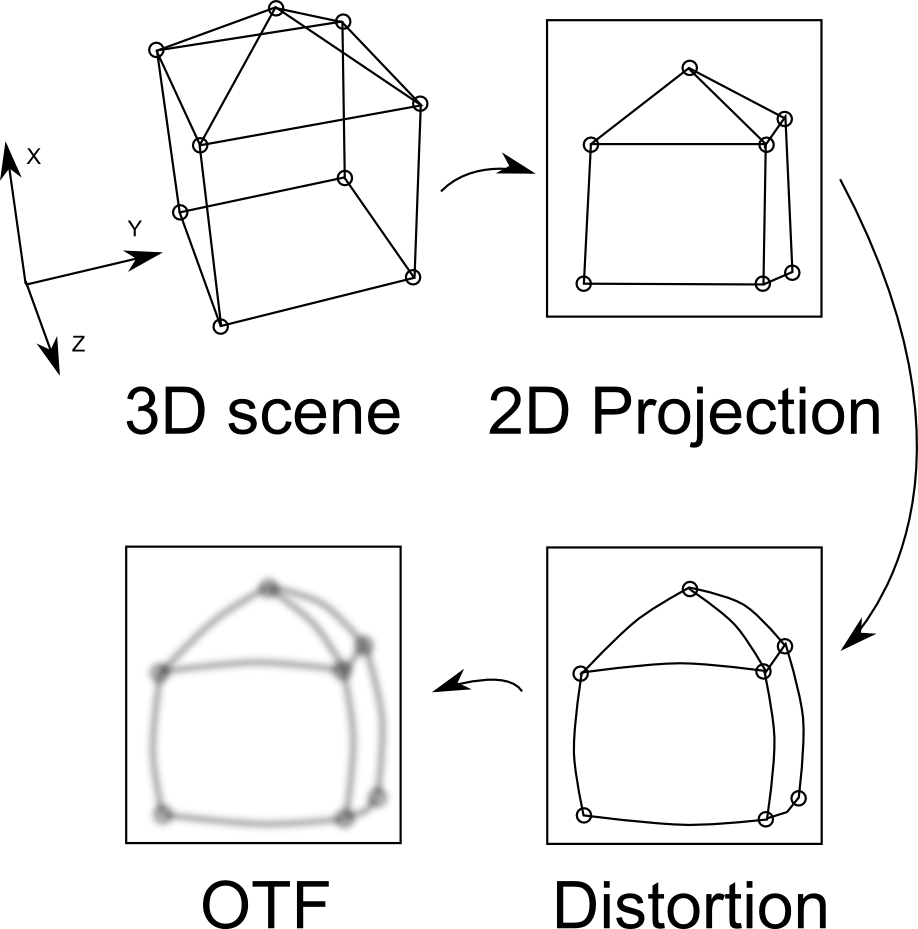
There exists different mathematical models for image formation, but for generic 3D measurement the most used one is the pinhole camera model. Pinhole camera model is often applied in machine vision applications because it is simple and accurate for camera systems with narrow angle of view. In the simplest pinhole camera model 3D points are directly projected to the plane of camera sensor after which optical distortion effect is applied to them. Even high quality optics has a non-ideal optical transfer function (OTF) which causes a single point to spread to a wider area on the camera sensor.

Pinhole camera model

In pinhole camera model 3D points $\textbf{X}$ are projected trough single point in space (camera center $\mathbf{C}$ / focal point) to the camera sensor.

Image formation path.

Optical transfer function

Point spread function

Motion blur

Collection of links to free FPGA learning material

Note that I’m currently biased towards VHDL -> Xilinx -> Vivado.

Online sites

Books