I saw a post on Reddit asking how to build a roof rack on a Fiat Ducato type of a vehicle, so here is how we build ours on a Fiat Ducato L3H2 2018.
When converting our van, we did not want to spend much on the roof rack, and we did not value our time either, so we designed and build our own. The hardest part was making of the roof rack mounting brackets. They could be bought for about 20-30€ a piece, but you can also build them yourself from U-shaped aluminum profile.
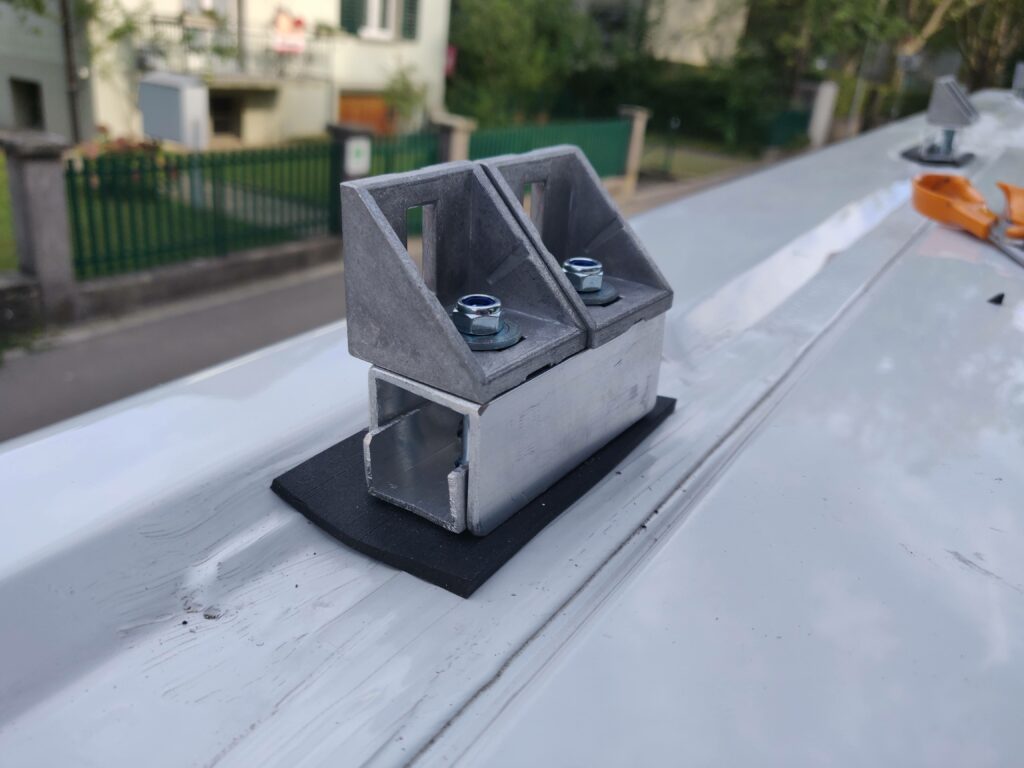
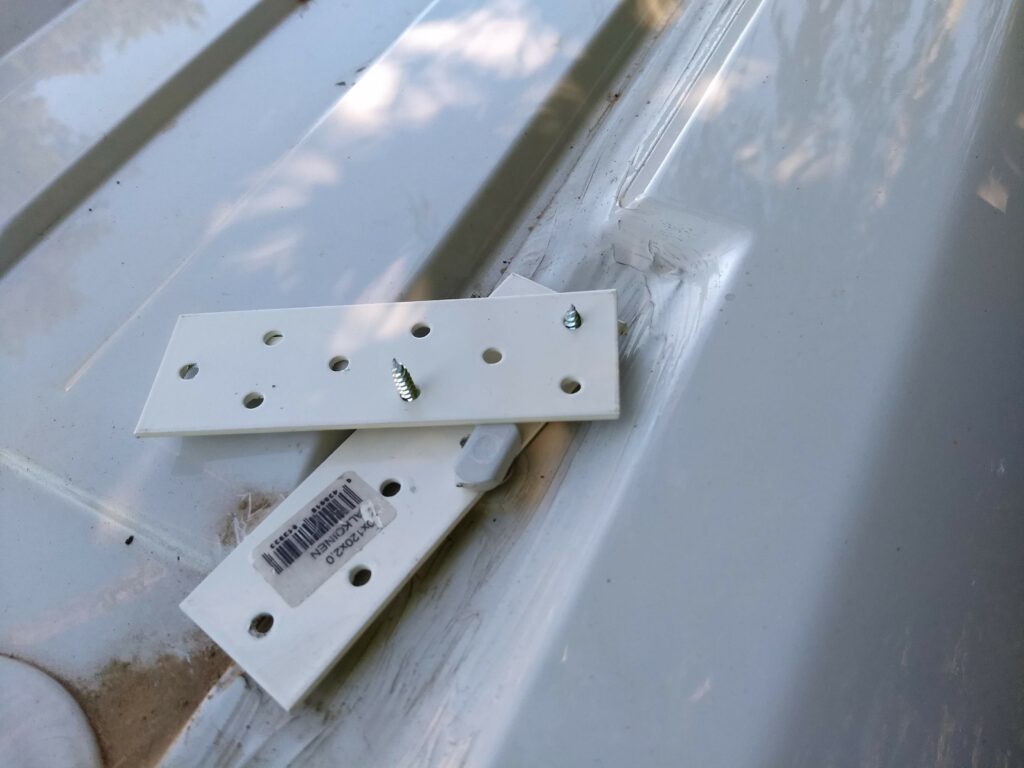
Finished mounting bracket 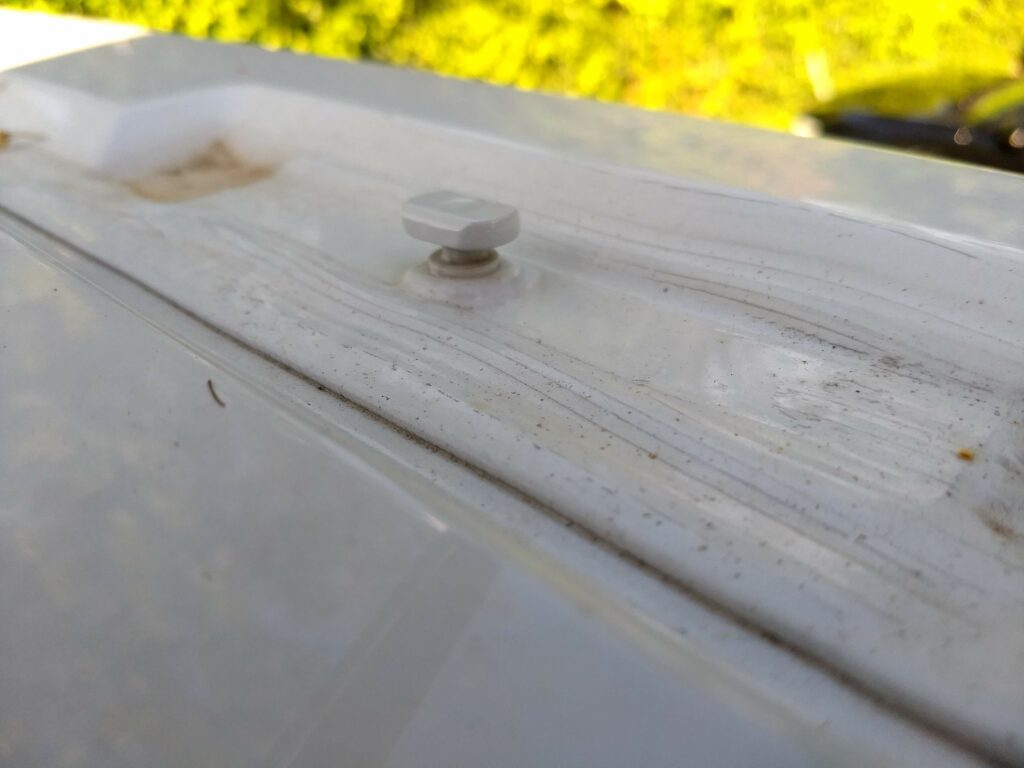
One of the 8 mushroom shaped mounting points
Making one mounting bracket took me approximately 10-15 minutes after few hours of experimentation.
It is not necessary to drill these smaller holes. I think I used 7.5mm for all the holes and then cleaned the rest with a very rough file. Much quicker. 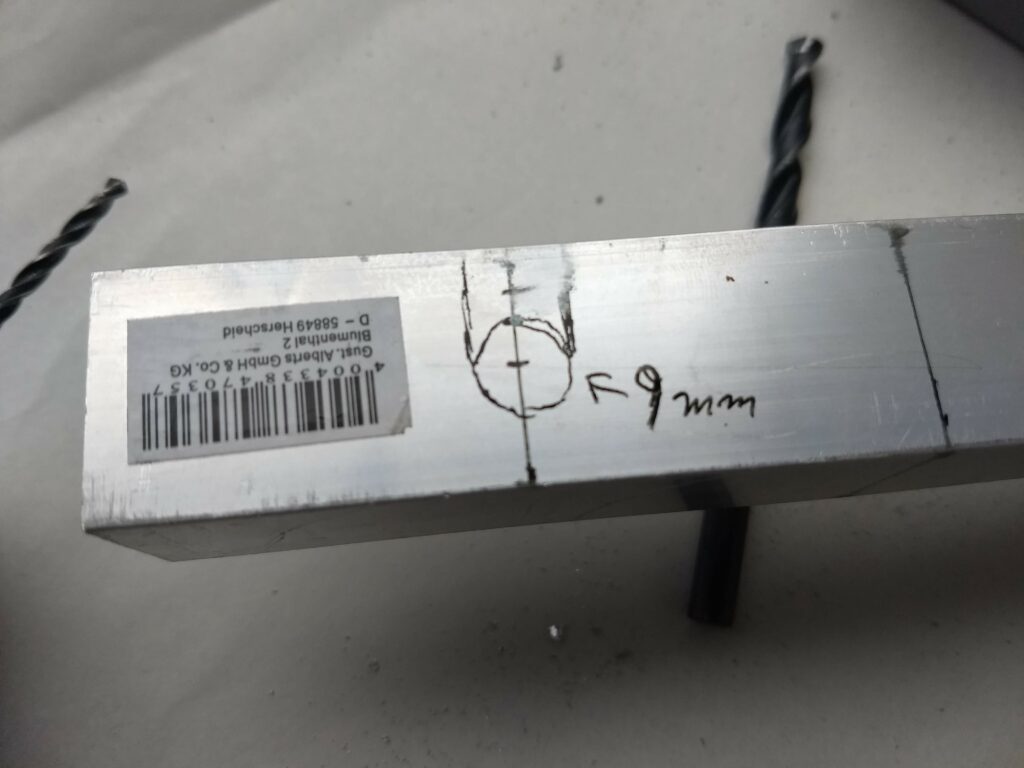
Can’t remember if 9mm is bit too big drill size. I might have gone with 7.5mm in the end. 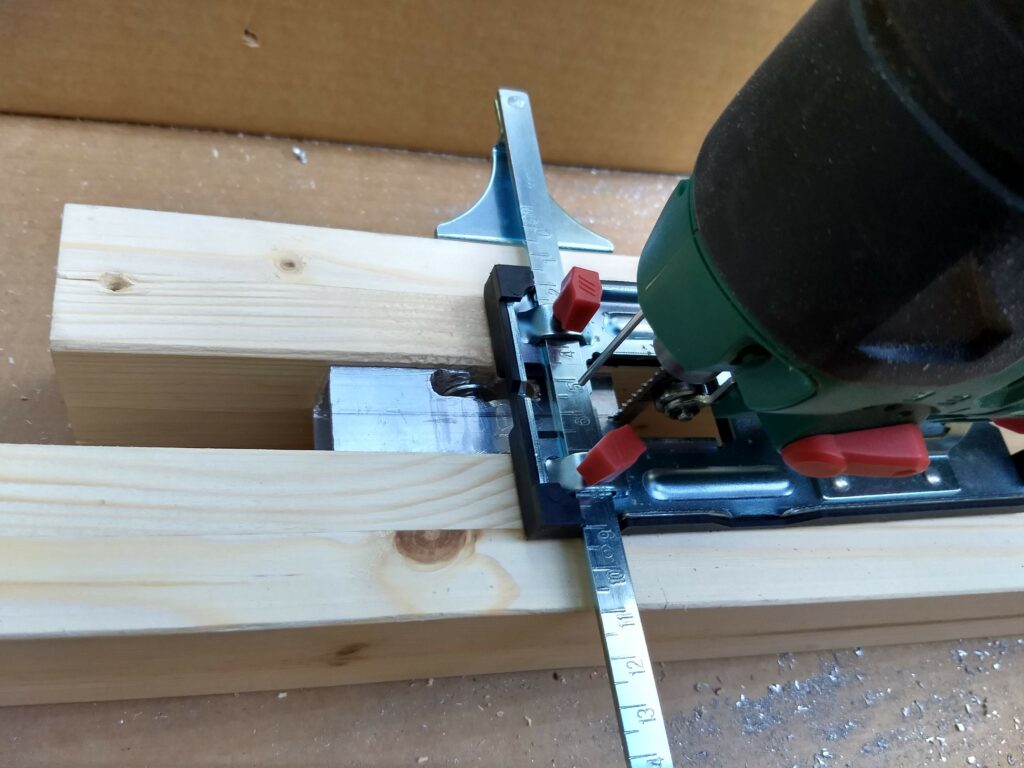
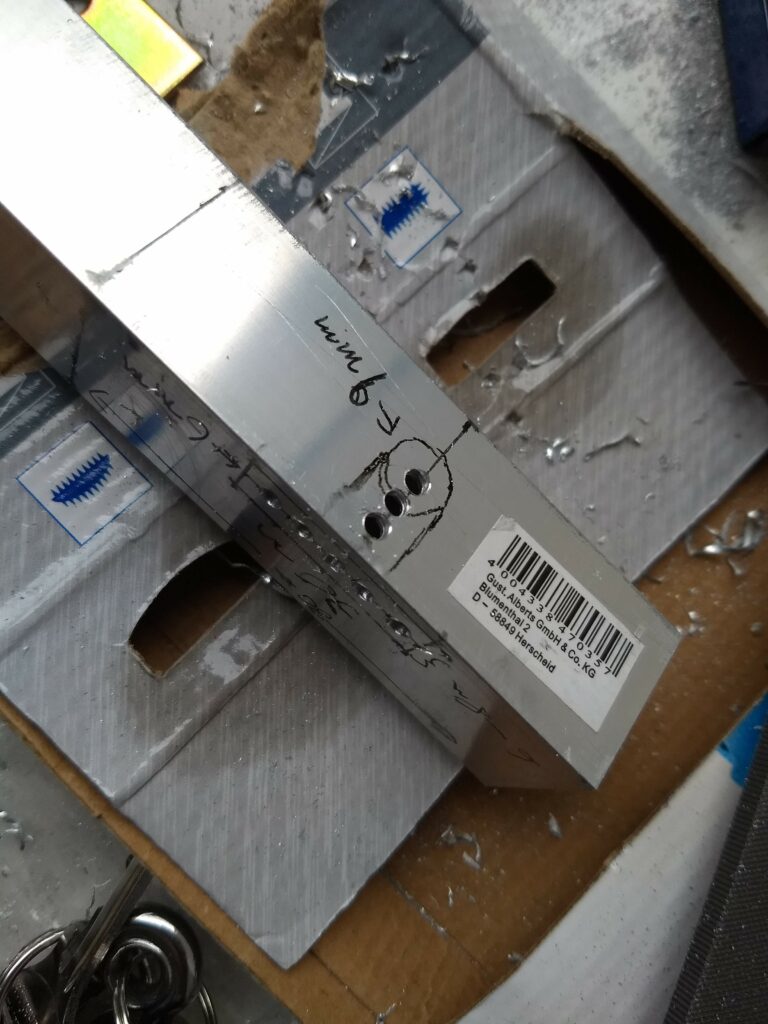
I screwed the mounting bracket onto a wooden block and then cut it shorter with a jigsaw 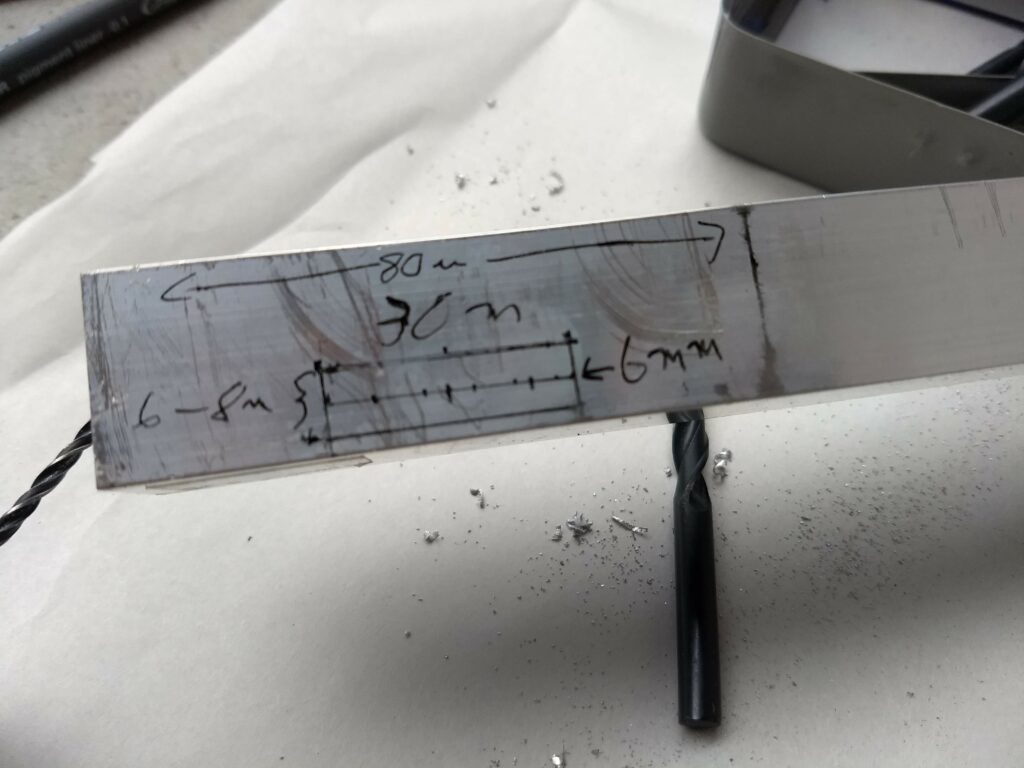
Approximate locations of the holes, from the side.
Take approximately 80mm piece of ~2.5cm sturdy U-shaped aluminum profile and drill 7.5mm-9mm holes into strategic locations. Make the profile a bit lower with a jigsaw, if needed. This piece should be then inserted into slightly larger sized U-profile (2.5-3.0cm, you can bend the sides of the larger profile to make the fit looser). Then trill two holes through both of the profiles and insert two low profile bolts through the holes. Do not make the holes too big, as then the bolt will turn loosely and you can not tighten the bracket. Note that if inner profile is too high, you can not tighten the bracket on the roof as the inner part will hits the surrounding piece.
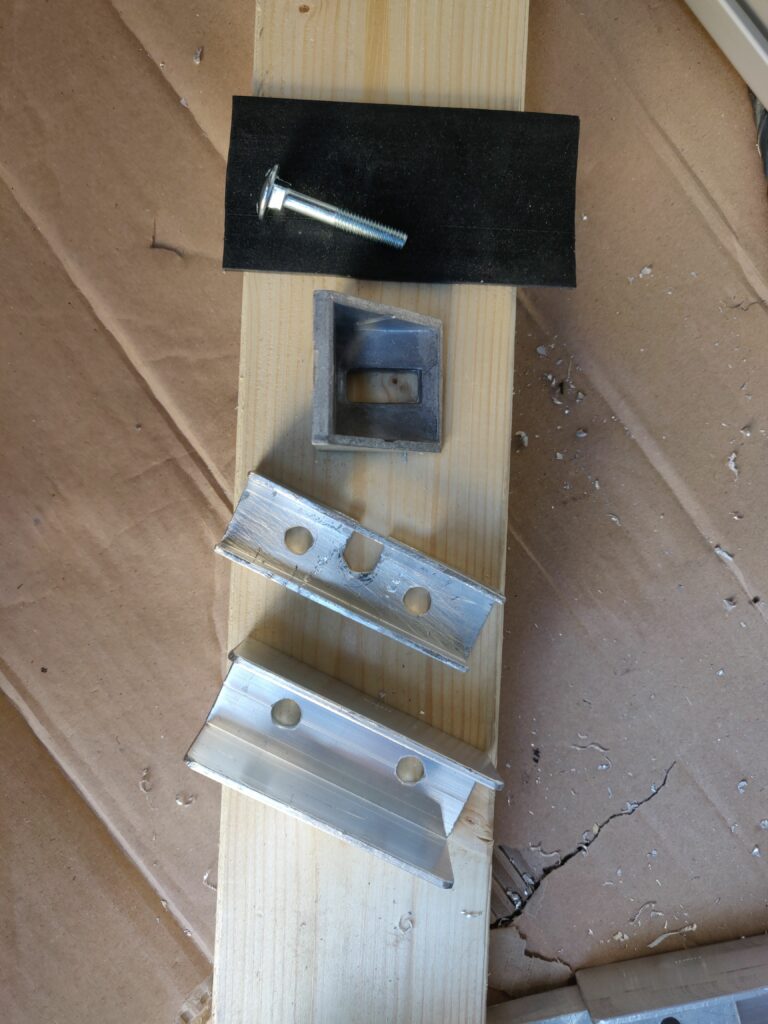
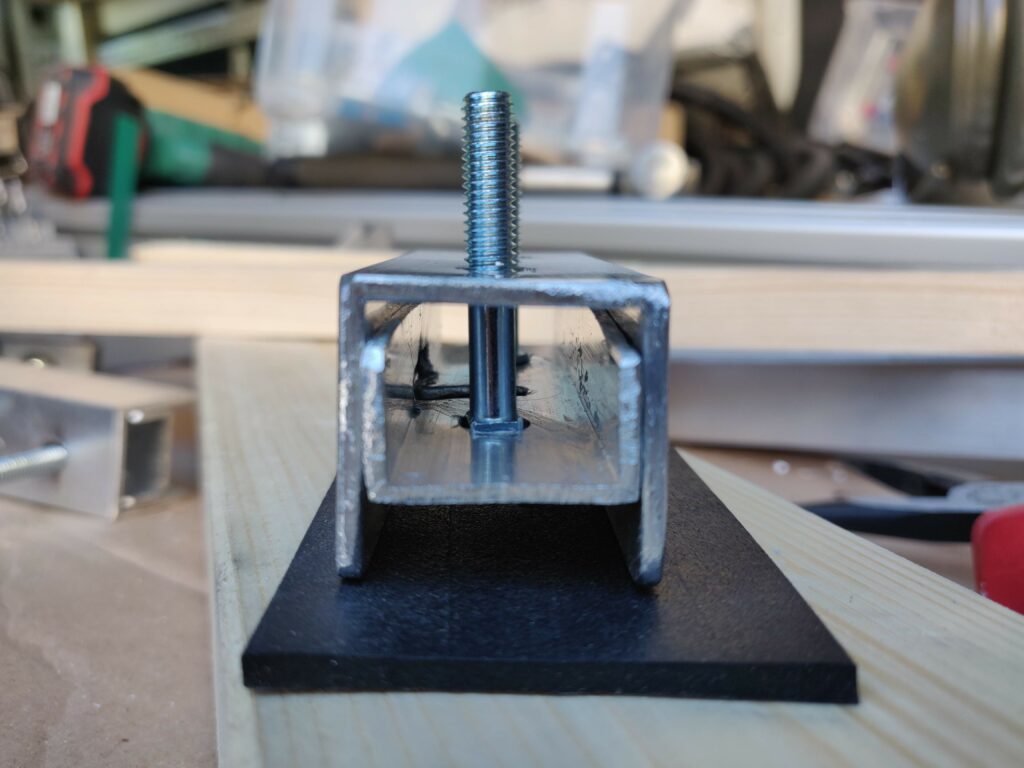
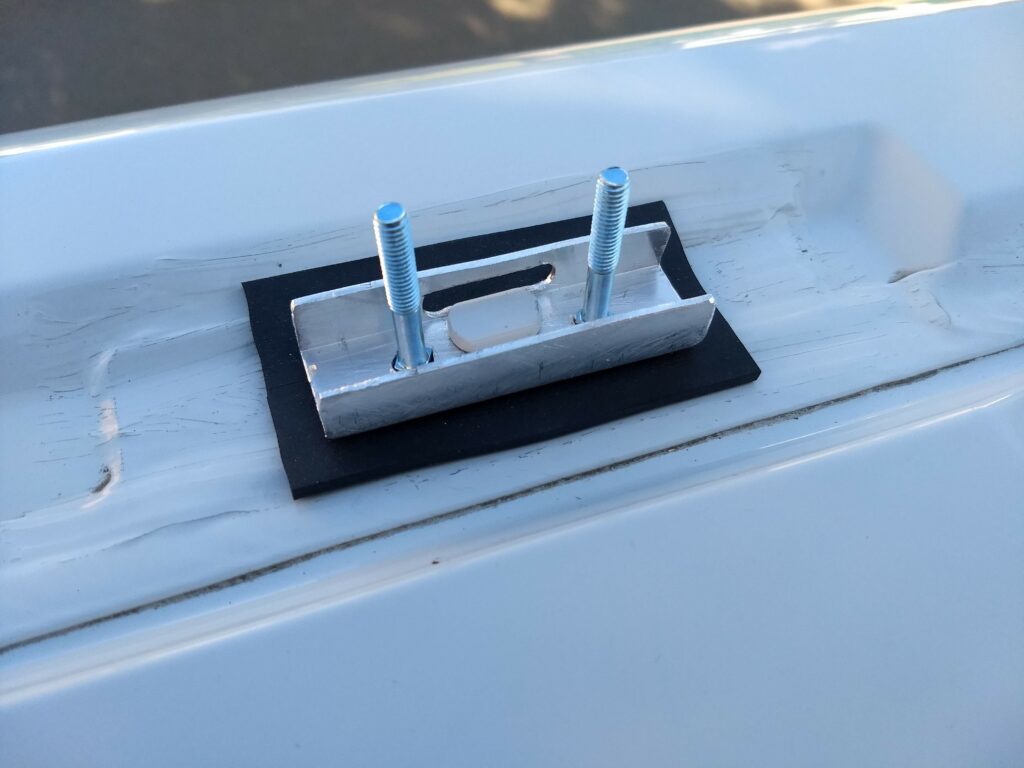
We added rubber sheet under the bracket to make sure that the roof is not damaged.
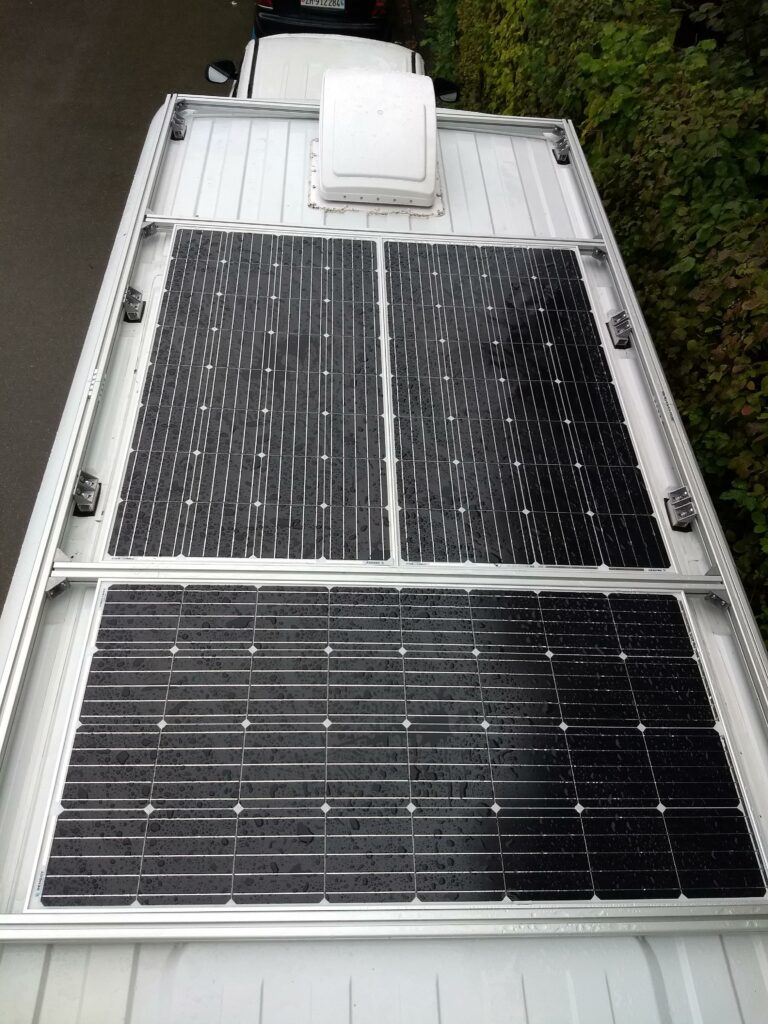
The roof rack itself is made from 40x40mm profile from https://easy-systemprofile.de. There are many other alternative sources to use in Europe, but for us they seemed like a good compromise. For easier installation and cheaper postage we decided to cut the long profiles into two shorter sections and connect them with connectors. The profile lengths are 2x1900mm, 2x1600mm and 5x1500mm. 1500mm profiles could be approximately 10mm longer, as in our case the profiles are few millimeters too short and there is a small gab between the connections.
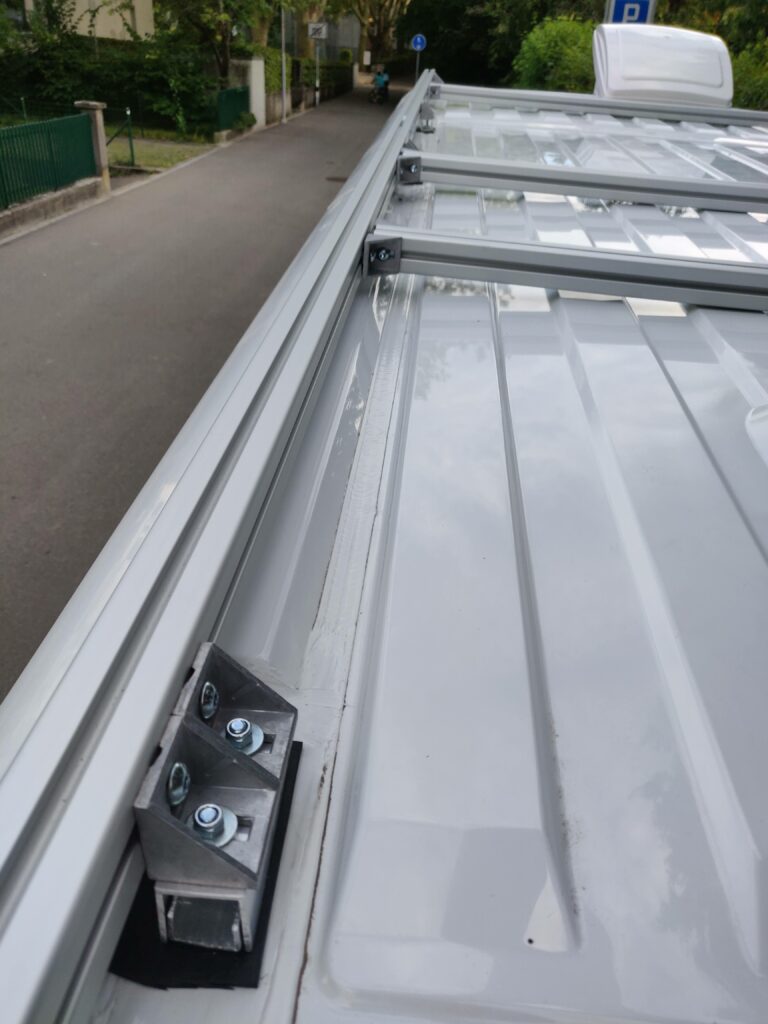
The roof rack is bit too low (it can be lifted bit higher than in this image). Adding 1cm more height would make installing the solar panels easiers. 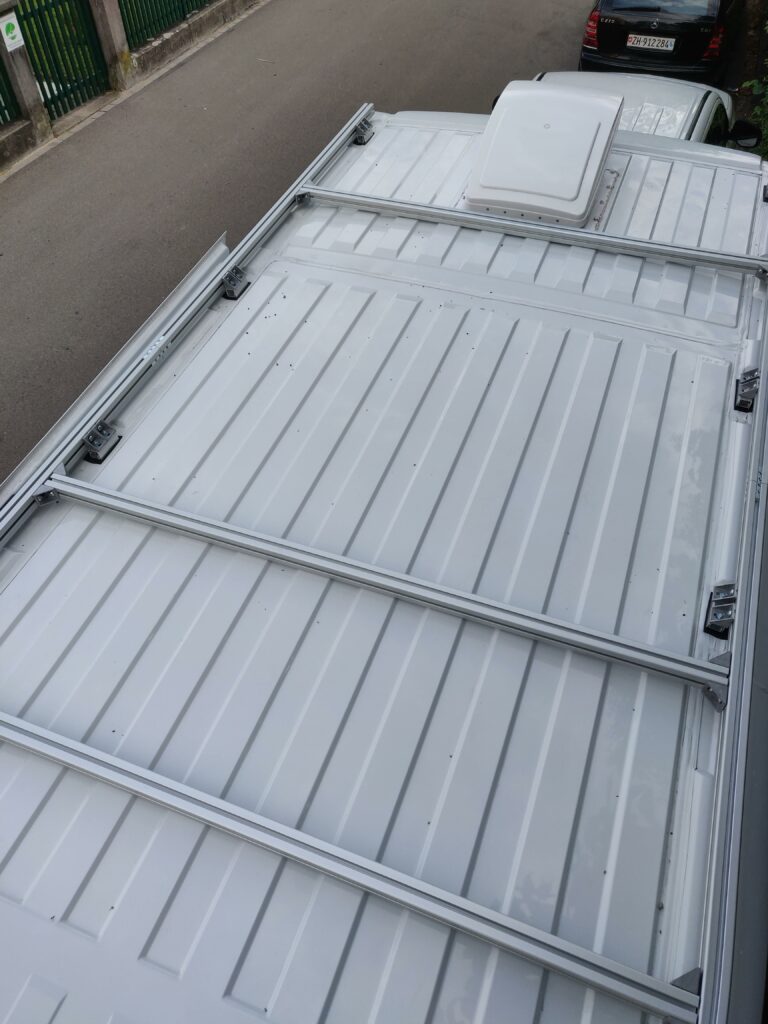
The end results is pretty sturdy and low profile and cost bit less than 300€ with all postages, nuts and bolts.
HI
I am trying to copy your brilliant design. what size are the two alli U shaped pieces please? tall one 40×40 and small (slot one) 30×20 at a guess.
Thanks Niel
Hi Niel!
I will try to remember to check the measurements today, but I think the measures were something like:
Smaller U-slot: width of 25.4mm. For the height, as low as possible, as taller one requires also taller outer piece. I think 10-15mm is fine. The stock I used was much taller but I cut it with a jigsaw.
Larger/outer U-slot: Width 30mm, height 30mm. Taller is better as then the smaller part has more room to move and lock the bracket in place.
Exact measures are not very important. The mushroom mounting point does not have much space below it so using very thick aluminum for the smaller part can mean that there is no space for the rubber mat. The two parts I have are very tight fit, which makes things harder to install. If the fit would have been loose, I could have used a cut rubber hose as a padding on both sides of the larger bracket. Now there was no room. With a cut rubber hose I think there would not be as much water underneath the bracket (we have not yet checked under the brackets after the winter).
Btw, nice build blog 🙂
Checked the raw U-profiles:
25mm (outer) x 25mm (outer) x 2mm (wall thickness)
30mm (outer) x 30mm (outer) x 2.5mm (wall thickness)
Thanks guys, i went for 50 50 x 3 mm outer and 45 x30 x 3mm iner quite tight fit so thigh i cant gat any rubber under.
great design though thanks
Niel
Hi, I’m following along with this great idea for my boxer. Just wondering what specific 90 degree angle brackets you used as the ones you used look really robust and I can’t seem to find anything remotely close? Thanks
Hi Mark! I think you mean these https://easy-systemprofile.de/Winkel-40-Winkel-40-Fraese–Fraese–Winkel-40×40-Nut-8.html Not sure who the manufacturer is, but similar brackets can be found from Amazon.
Hi, I’ve recently built your roof rack on my bocer and its bloody brilliant! But i’m having a little trouble mounting the solar panels to the strut… I have rigid solar panels in the exact same layout as you. I have mounted one, and found that I actually needed to drill out the sides of the solar panel, which is fine it worked but I just wondered how you found actually fitting your panels in the roof rack? I’m finding it more than a little tricky!
Sorry I have forgotten to reply to you! Yep, mounting the panels was quite tricky. I assembled the panels+3x short 1500mm aluminum profiles first upside down into a single unit which I then flipped correct way. I used wooden boards to cover the roof under the aluminum profiles. I did this alone, but would definitely recommend having two people. The solar panels don’t have very rigid frame which makes this harder as the “unit” will flex while flipping which could potentially crack the solar panels.
I think other option could be assembling the “unit” while parking the car close to a wall and building the leaning against the wall.
Hi,
I really like what you have done – I have used aluminium for internal conversion work – btw when I have asked the supplier if I could use the same for outside, the answer was no as it should be aluminium anodised. Have you had any problems with it?
I have had no problems with the cheap aluminum
Dear buq2,
you have saved my sleep and my wallet.
I hadn’t slept for nights thinking about an alternative solution to the racks on sale (which are very expensive) and accidentally came upon your website.
Thank you for sharing your experience, a greeting from Italy.Dear buq2,
you have saved my sleep and my wallet.
I hadn’t slept for nights thinking about an alternative solution to the racks on sale (which are very expensive) and accidentally came upon your website.
Thank you for sharing your experience, a greeting from Italy.